
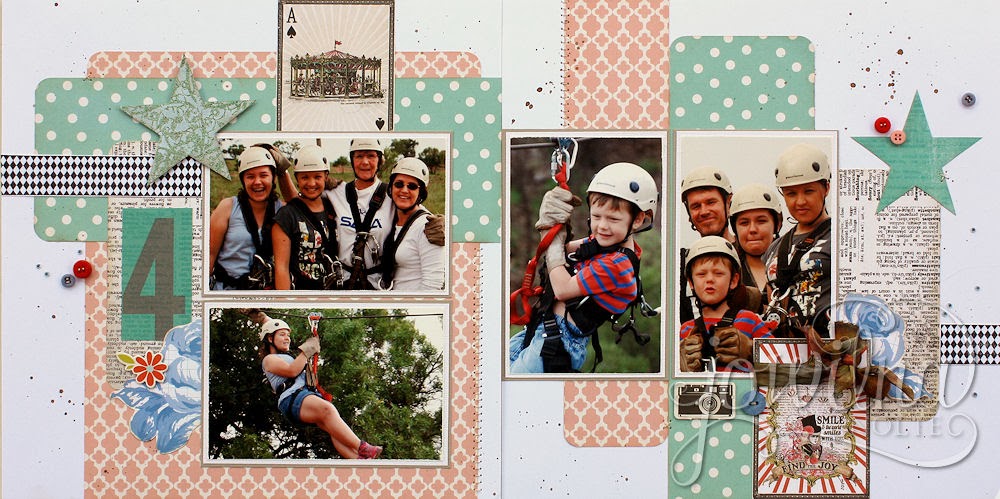
Chiswick layout - Burnishing paste combined with heat embossing.
7:30:00 AM
Hello from me with a new sponsor on board - welcome Chiswick - a wonderfully local company that imports some really amazing crafting products and made them available for me to use.I like nothing better than cross-marrying craft and art products into what i do, and this week i got to play with an amazing range of Burnishing pastes that Chiswick sells. I knew i would love this product from the minute i saw it - it's right up my alley you know. so here's what i did with it this month - i incorporated it into a double page layout with a technique. *PS for this layout i used a sketch as inspiration found on Pinterest but sadly can't find the link in my life called chaos.
I combined the beautiful range of Heidi Swapp papers
I love the versatility of good products, and
because I have a ‘no rules’ approach to scrapbooking and card-making I can
easily incorporate unexpected and unconventional products into my design work.
I got to work with the beautiful “Intricate Patterns” stamp set from Chiswick
recently and love how versatile they are. The patterns can be fun and classical
at the same time which works perfectly for me. But it didn’t end with the
stamps – I wanted to add some shimmer in a subtle way so I combined the
beautiful stamps with their burnishing paste range (which is really made for
decoupage work) – and I was thrilled with the end results!
Adding texture and pattern
I used the large stamp and embossed it using a multi-coloured embossing powder onto plain smooth white cardstock. The pattern look really nice on the white but I found it too stark and had the perfect solution. I love hoe the stamp can give me a pattern by stamping it, but also texture when I emboss it using an embossing powder heat set with my Chiswick Heat gun.
I used the large stamp and embossed it using a multi-coloured embossing powder onto plain smooth white cardstock. The pattern look really nice on the white but I found it too stark and had the perfect solution. I love hoe the stamp can give me a pattern by stamping it, but also texture when I emboss it using an embossing powder heat set with my Chiswick Heat gun.
I also added the
harlequin stamp design to my layout by stamping it in black ink onto the same
smooth white cardstock I used for the embossing. The stamp image is really
beautiful and so versatile.

Adding colour and shimmer
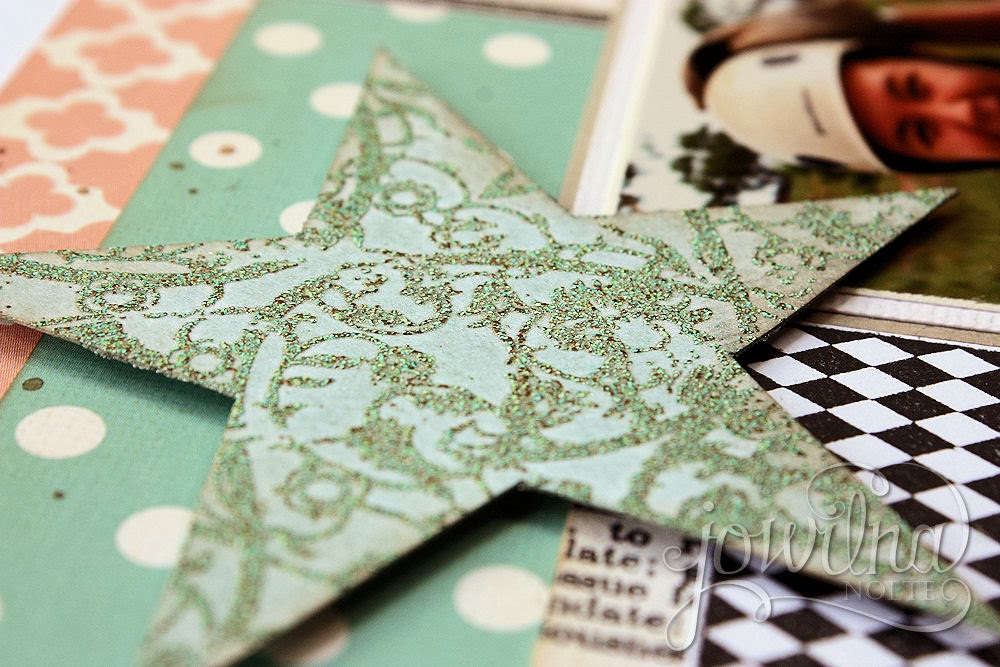
I used two colours of Burnishing paste combined to give me the result I was looking for. I used an old cloth and added a layer of the metallic blue burnishing paste and covered the embossed image and background paper in small circular movements to avoid streaks. The burnishing paste goes on really smoothly and looks great giving the white smooth cardstock a slight shimmer and just breaking the whiteness. I then added a layer of the Metallic German silver paste in the same way over the entire surface as before. The silver really made things look amazing – giving the white paper that lustre and magic I was looking for. The close-up image of the embossed stamp and coloured using the paste, and then trimmed into a star shape for my layout. Underneath the star you can see the stamped harlequin strip adding more pattern and contrast.
I used two colours of Burnishing paste combined to give me the result I was looking for. I used an old cloth and added a layer of the metallic blue burnishing paste and covered the embossed image and background paper in small circular movements to avoid streaks. The burnishing paste goes on really smoothly and looks great giving the white smooth cardstock a slight shimmer and just breaking the whiteness. I then added a layer of the Metallic German silver paste in the same way over the entire surface as before. The silver really made things look amazing – giving the white paper that lustre and magic I was looking for. The close-up image of the embossed stamp and coloured using the paste, and then trimmed into a star shape for my layout. Underneath the star you can see the stamped harlequin strip adding more pattern and contrast.

Step 1
Use Versamark ink and stamp the image onto white cardstock. Add embossing powder over the image and shake off the excess powder.
Use Versamark ink and stamp the image onto white cardstock. Add embossing powder over the image and shake off the excess powder.

Step 2
Heat set the embossing powder using your Chiswick heat gun. Once the embossing has cooled down, use a small amount of Metallic blue burnishing paste and an old cloth and in small circular movements add the paste covering the entire piece of cardstock.
Heat set the embossing powder using your Chiswick heat gun. Once the embossing has cooled down, use a small amount of Metallic blue burnishing paste and an old cloth and in small circular movements add the paste covering the entire piece of cardstock.

Step 3
Once you are happy with the first layer, add a second layer of Metallic German Silver Burnishing paste. By adidng the first layer of blue, which is alight colour when added to cardstock, you are priming the cardstock for another layer. In essence the first layer prepares the cardstock and makes it smooth and silky, so that when you add the second layer it takes a lot better to the cardstock and won't leave streakes or ugly marks. Remember to use small circular movements when adding the burnishing paste.
Once you are happy with the first layer, add a second layer of Metallic German Silver Burnishing paste. By adidng the first layer of blue, which is alight colour when added to cardstock, you are priming the cardstock for another layer. In essence the first layer prepares the cardstock and makes it smooth and silky, so that when you add the second layer it takes a lot better to the cardstock and won't leave streakes or ugly marks. Remember to use small circular movements when adding the burnishing paste.

Hints and tips
You only need a small amount of burnishing paste to add colour to your project – remember it is always easier to add more than it is to take away
You only need a small amount of burnishing paste to add colour to your project – remember it is always easier to add more than it is to take away
I used a smooth
white technique cardstock for adding the burnishing paste – a textured
cardstock will not work as well
You can simply
change the entire look by changing the colour of your embossing powder. For
example, imagine how gorgeous an image embossed in silver will look with gold
burnishing paste in the background – I think I may just go and try it right
now!
Remember if you
battle to get a nice clear impression when stamping, try placing your cardstock
on a piece of foam (an old mouse pad or magazine) and stamp onto that – this
will give you a nice image every time. Some people battle with stamping and
this is a sure way of getting a perfect image every time.
So why not try your
hand at the Burnishing paste and see the amazing results for yourself. And
don’t perfect about the beautiful and versatile stamp set! If you can’t get it
at your local store ask for it by name
Products
used
Product Code: st1007 Chipboard Adhesives – Ephemera
Product Code: rs3167 Clear Stamp - Intricate Patterns 140 x 180mm (ER-21)
Product Code: pa2210 Metallic Blue & Metallic German Silver
Product Code: cr0930 Description: General Purpose Scissor 215mm
Product Code: st1007 Chipboard Adhesives – Ephemera
Product Code: rs3167 Clear Stamp - Intricate Patterns 140 x 180mm (ER-21)
Product Code: pa2210 Metallic Blue & Metallic German Silver
Product Code: cr0930 Description: General Purpose Scissor 215mm


2 comments