Assembling paper elements to a Father’s day layout using the Xyron.

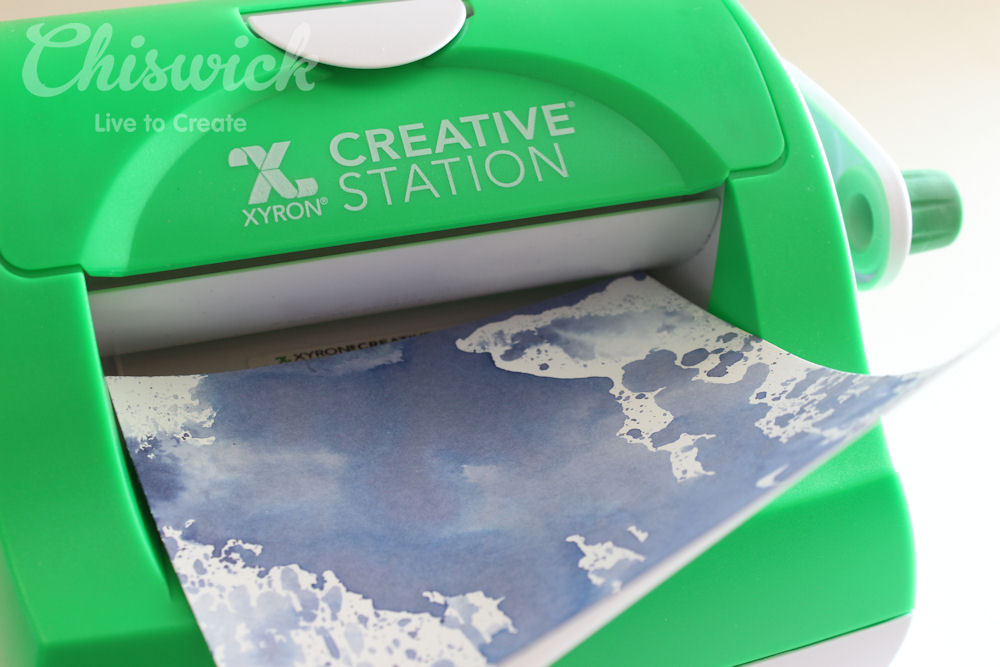
The question I get asked a lot lately is how do I adhere my small paper and cardstock elements to my layouts? well, with my Xryon – yes it seems like I am really going
on and on about this little machine – but it truly is my go to problem solver these days. It is just such a quick and easy solution to any sticky-problem you may have.
For this layout I created a lot of elements that required adhering to my layout – some are pop out cardstock elements, others were cut on my Silhouette machine like
the photo corners, and others cut from patterned papers – but everything was adhered by adding permanent adhesive with my Xyron.

Even with thin papers and elements, the permanent adhesive cartridge adds a perfectly thin layer of adhesive that does not show through.
step 1 – Pop out some cardstock elements, cut your elements and cut different signs from patterned paper.
step 2 – Load the elements all together into the front of your machine and turn the handle to feed them through.
Remember to keep them face up
Keep feeding the elements by turning the handle until they all appear at the back. Cut off using the blade attached.
step 3 – make sure you burnish the plastic covering so that the adhesive that may peek out the sides adhere to the plastic covering and not your elements.
step 4 – Remove the plastic covering to reveal the elements with the adhesive at the back
step 5 – Remove the element you want to adhere from the backing sheet.
step 6 – Adhere and layer the elements in one quick easy step.
My cardstock elements used for this layout was layered on top of each other, and with the Xyron it is so easy.

It just goes to show you can create an entire layout with the Xyron Creative Station – no mess no fuss and no sticky residue!
Browse the Chiswick website and order your Xyron today!

Make sticky die-cuts with the Xyron Creative station.

In the build up to Father's day I created these quick and easy gift card envelope using my Xyron Creative Station. I used my Permanent Adhesive cartridge to add adhesive to my cardstock before die-cutting some delicate and detailed words. By adding the adhesive first and then cutting my words, I avoid a mess trying to get adhesive onto my words afterwards. So quick and easy!
It’s that time of the year that we are celebrating dad’s all around thew world – your earthly or heavenly Father – we all have one or know one that has blessed our lives with goodness, kindness and love. So create something to celebrate him, or just spoil him with something special.
Here’s how…
Step 1 – Take some white cardstock and add colouring using inks and mists.
Add the permanent adhesive cartridge to your Xyron Creative Station.
Step 2 - insert the coloured cardstock face up through your Xyron – remember the adhesive is added
to the bottom part so whatever you want to be visible needs to face upwards.
Step 3 - Remove the plastic piece from the front of your coloured cardstock piece.
Position the die you want to use to cut your words onto the coloured and now sticky backed cardstock piece.
Step 4 - Send the die and cardstock through your die-cutting machine to cut the words.
Step 5 - Carefully remove the cut word from the backing sheet.
TIP:
The die-cut word is now cut and has adhesive on it – you can simply adhere it to your project.
This is an amazing way to add adhesive to those delicate and detailed die-cuts without adding glue after cutting them – no mess and no fuss.
TIP: Do not worry if the word does not cut right through the plastic backing at the back. All you need is for the die to cut through the cardstock.
You want the adhesive on the back of the cardstock that makes adhering ithe words really easy.
I love how the Xyron makes my creative life so much easier – I don’t have to battle with delicate die-cuts and glue – the Xyron does it all for me!

What have you done with your Xyron today?
And if you don’t own one – then head on over to your local craft store or order it from www.chiswick.co.zawww.chiswick.co.za

Modern Vintage an Antique Bazaar Layout.

Fancy a bit of a vintage layout, then the new Kaisercraft paper range is just for you. Perfect for those old photographs that need a little something special, and even some colour without being overwhelming.
When I first saw this range I had my doubts, but the more I used it the more I realised how versatile it is. I have made several layouts with it and they are all totally different from each other, each with its own unique feel and look.
For this single page I layout I used some of the papers and cut different width strips and lined them all up in different heights on the left hand side of my layout. I wanted to use an enlarged photo on the right hand side so this made the most sense. The paper strips offers some colour – a beautiful golden yellow, gorgeous patina turquois and then some old red.
On top of the strips I layered some clock circles cut and punched from the patterned paper. I used 3 clock circles, and then added a fourth circle element cut on my Silhouette machine. Notice how even though I added a fourth element how they balance each other out. The two cream clocks, and then the two black circle elements. I still kept my cluster closely together and added other elements to break things up a bit, like the die cut element, sewing and diamanté.
As a finishing touch and to add some pattern to the background, I added stamping and stencilling.
And in the end I really love this layout – old and yet new at the same time. Perfect for vintage memories and the men in your life – it all depends on how you use the paper stash t create the mood and feel you want to convey.
We hope you love this range as much as we do!

How to turn your die-cuts into stencils using the Xyron Creative Station.

Up oin the Chiswick blog, I am creating with the Xyron Creative Station and Repositionable Adhesivemaking my own stencils. Head on over to the blog to see more...
http://www.chiswick.co.za/uncategorized/making-stencils-using-the-xyron-creative-station/
Such an amazing product that can be used with all my die-cuts turning them into some pretty amazing and useful scrapbooking tools. I am lost without it.
Happy Thursday everyone!

Yummy Stamped Serviettes!

I am up over on the ImagineCrafts blog with this little altered serviette project.
I love the versatile ink range by Tsukineko making it easy to alter home decor project, fabric and paper.
Hop on over to the blog for the full step x step on how i created these...
White is such an amazing blank canvas – from cardstock to canvas to fabric. White enables you to create and alter whatever you can dream up. For those special afternoon tea time treats on the patio I altered some white linen serviettes to make them a bit more special.
Imagine Crafts Featuring Tsukineko
Other Supplies: Stamps: Silhouette: Dina Wakeley, Stars Unknown, Serviettes, Clothing Iron

Details with cutting dies on a layout!

The more I use my collection of dies, the more I fall in love with them if that is even possible. I mean I really love the designs, but sometimes it is just an effort to pull out all the bits and pieces and actually use them – do you sometimes have that feeling? I know you do!
So in an effort to love my dies more and use them more, I have opted to keep my Cuttlebug machine on my desk permanently and that have made all the difference.
I started using my dies more and I love the simplicity they add to a layout, project life pocket and card – making such a huge impact. And the best part, you don’t need to do much to them to make them come into their own right.
For this layout I created a really busy background using inks and patterned papers. I wanted to add some soft flowers, but that didn’t work with the background so I opted for some die cuts to dress up my layout and finish it off.

step 1- I used the beautiful Prima flower die cuts and cut 3 large flowers out of smooth white AC cardstock. I left them white as is. To make the delicate cuts release easily from the die, I used Quick release paper between my die and cardstock.
step 2 - I then cut some yellow flowers using yellow smooth cardstock. I cut the yellow flowers in half since I was only tucking them under my packaging piece used for my photo matt.

 step 3 - Cut the ‘locked’ die out of smooth white cardstock and ink the edges using brown chalk ink and a sponge dauber for a distressed look. TIP: to create an old world distressed and rusty look on my key hole die, I could have used a combination of embossing in silver and black dye inks, but I wanted it to be clean and fresh and uncomplicated.
 step 4 - Adhere two strips of patterned paper to your background cardstock. Add a layer of white gesso to the papers to make the ink adhere better to it. TIP: Gesso creates ‘tooth’ for ink and mist to adhere better to paper and cardstock as well as other surfaces like canvas, wood, metal, plastic.
step 5 - Position your photo matt, in this case my packaging piece and the die cut elements onto your prepared background to determine the correct placement. I tucked the flowers under the top left and right hand corner and then adhere them using two large brads. TIP: By leaving the die cuts loose on your layout, you create movement and dimension.
 step 6 - Add mists and colour to your background using Prima Colour Blooms.
 step 7 - Once all the inks are dry, adhere your photo in place. Adhere the ‘locked’ key hole die on the left overlapping your photo. I cut a second lock out of grey cardstock and adhere it in the keyhole. You can also just back the keyhole bit with patterned paper behind the opening to add colour and dimension.
 step 8 - Add a second colour to your background using a second colour of mist as an accent colour. Finish off with additional embellishments.
 PS: to minimize the buckling of my layout after adding all the inks, mists and mediums, I adhered it to a piece of grey chip using my Tombow glue stick making it really smooth and firm.
In a few easy steps I added some gorgeous details using cutting dies on a layout – simply cut out of cardstock – quick and easy.

Project Life details using the Xyron Creative Station.

Welcome to May – can you believe how time flies? With the cooler weather our way here in the South I am creeping deeper into my craft space and catching up on my Project Life album. I am so excited to be incorporating the Xyron Creative Station in my Project Life. It sure has made some things so much easier. Today I am sharing a nice and easy tip, making your life a lot easier.

I like using delicate and sometimes not so delicate die-cuts into my Project Life layouts. But sometimes inking and adding colour to these die-cuts can be tricky. So here’s how I solved my dilemma Step 1 – Place the Permanent Adhesive cartridge into your Creative Station.
Step 2 – Die-cut some borders out of white cardstock. Feed the borders through the Xyron to add the adhesive.
Step 3 – Peel away the top plastic protective layer after removing the die-cuts from the machine.
Step 4 – While the die-cuts are still on the backing from the adhesive sheet, use a sponge to ink the die-cuts.
I used two different colours of ink to ink my borders, and then used a black ink to stamp a small pattern onto the borders.
TIP: By leaving the die-cuts on the backing sheet, you can easily ink, stamp and alter the plain white cardstock into something really special.
Step 5 – Remove the altered borders from the backing sheet and adhere it to your photos or project.
Step 6 – Use your Chiswick scissors to cut off any excess of the die-cut from your photo.
Step 7 – Add any additional embellishments and decorations to your die-cuts, and then insert them into your Project Life sleeves.
I love how the Xyron can make something so simple even easier. In a few easy steps I could cut, add adhesive and ink my borders without any issues.
The Adhesive backing paper comes in really handy as an inking surface eliminating unnecessary transfers onto a craft sheet. Have you bought yourself a Creative Station yet? Well i think now is a good time to do so – the possibilities are endless.
Acid-Free Permanent Adhesive Refill Cartridge (18′) xt1605
5″ Creative Station Machine xr0510
Head on over to the website to view all the products in the Xyron family available from Chiswick.


It’s just a Kaisercraft Oh So Lovely Layout.

Soft beautiful florals, birds and gorgeous accents are what caught my eye when I first saw this range. But on even closer inspection it is the colours that seamlessly complement each other into the designs for perfection in design…that is the new Oh so Lovely paper range from Kaisercraft 

I know that with every new range you just think that the one before it was the most beautiful thing you have ever seen, and then there is the next one, and each time they become your favourite – that is the life of the creative soul. A vicious circle of beautiful colours and design merged into one to form something that the soul finds a reason to smile… and so it was with this range.

It literally spoke to my heart and soul completely. I love everything about it! The designs the colours the delicate birds and beautiful script writing detail hidden amongst a flower medley.
And so came to be this double page layout filled with texture and design. The layout itself is uncomplicated but it is the details that make this layout so much more interesting. Even the photo selection was something that happened by chance, and in the end it is the unexpected use of the photos that became my favourite part of this layout – pulling together all the interesting elements for a really fun and striking layout.

I used the Prima Copper crackle texture paste to add some texture to my background. I added the paste across the layout once it was completed, as I wanted to add some texture paste over my patterned papers too. I used a palette knife and a stencil, and once applied walked away to leave it to dry completely.

The collectables pack matching the paper range is filled with so many beautiful designs and elements I had a hard time choosing what to use, but settled on this beautiful bird and cage. I used foam tape to raise them slightly adding dimension to my layout.
 love stamping and a layout is never complete if it doesn’t have some stamping on it – the perfect finishing touch to any project. I used my trusty Versafine sepia ink pad to stamp the detailed images onto some coloured scrap papers.

Across the centre of my layout I added a beautiful quote stamp alongside my giant title. The title was cut on my Silhouette machine and then embossed using AC embossing powder in yellow. The embossing powder colour was perfect element of surprise Рbold and unexpected. I finished off my layout with some hand sewing, buttons and diamant̩.

 I love everything about this paper range and layout – feminine, beautiful, classic and some elements of surprise added to make it really stand out. How will you use this gorgeous range to create something fun and extraordinary? Please feel free to share your Kaisercraft Oh So Lovely Layout!

Sweet Mum – A Card Just for Her.

It's Mothers' day weekend and I hope you have made something handmade for that special person in your life? I made this little birdie specially for her, featuring some of my new favorite IMAGINE Crafts and Tsukineko products. Head on over to the blog for a step x step on how to re-create this quick card.
My mom loves birds and so for this Mother’s day I wanted to make a card that incorporates a little birdie. Thankfully I have some really cute stamps and with the help of the amazing StazOn Studio Glaze I could add some really amazing color to my image. For my sentiment I used two stamps and stamped them in different colors for a fun look.  Learn how to make your ‘Sweet Mum’ this lovely sentiment here!

Popular Posts

Like us on Facebook

Flickr Images