How to photograph your scrapbooking layouts.

There’s nothing worse than a beautiful layout that has been badly photographed. It’s not always that easy getting the perfect shot of your artwork if you don’t have the right tools. By the right tools I mean Studio lights, speed lights, tri-pods and hi-end cameras with top of the range lenses. I never used to have all of those and only acquired some of these in the last year. So how can you at home photograph your layouts – I am sharing some of my tips and tricks that I have learned throughout my career of spending lots of time with professional photographers and my own experience. **The below steps is a beginners guideline that has helped me over the years, you will most likely not be a pro and it does take lots of practice

Photographing from above and editing 
Find a spot in your home that has lots of nice natural light. 
This is typically next to a window with nice and bright light streaming in. You can also go outside under a covered stoep or patio – as I do since our thatch house is so very dark inside. I do want to point out that it is best to have light that is indirect or diffused rather than harsh direct light shining right on your layout. 

It is also best to photograph your layouts during the day when you have nice light so you don't have to use your flash. If you do it at night with your flash, your layouts will look more flat and less 3-dimensional and you also may get some bad shadows and flash spots on your photos. Photographing at night will cause colours to be off. 

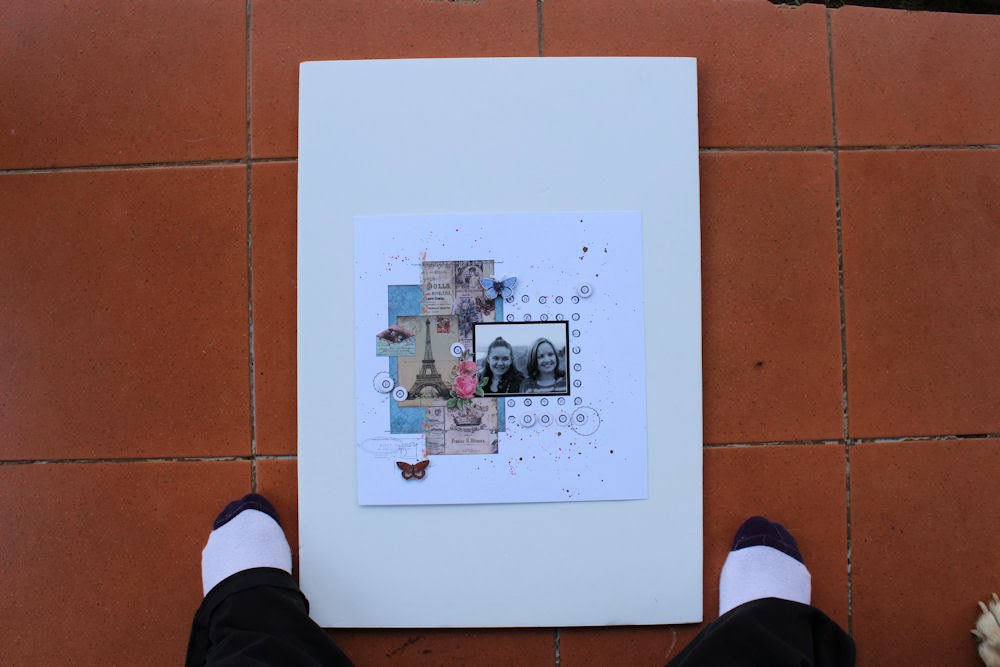
Find something to use as a background for your layout. You are looking for a clean solid white background that doesn't distract from your layouts. There are lots of things you can use for example a sheet of white project board, a large flat canvas, mounting board or even a white bedding sheet, plastic sheeting used for infinity curves etc. 

Simply place your layout on your background and make sure you have good lighting without any sunspots directly on your layout. 

To photograph the layout I stand directly above it and get in close enough (either physically or with the zoom on my lens) so that you are filling the frame with your background and layout. I always leave about an inch or 2 of the white background all around the image visible. The white board also reflects some light which is good. 

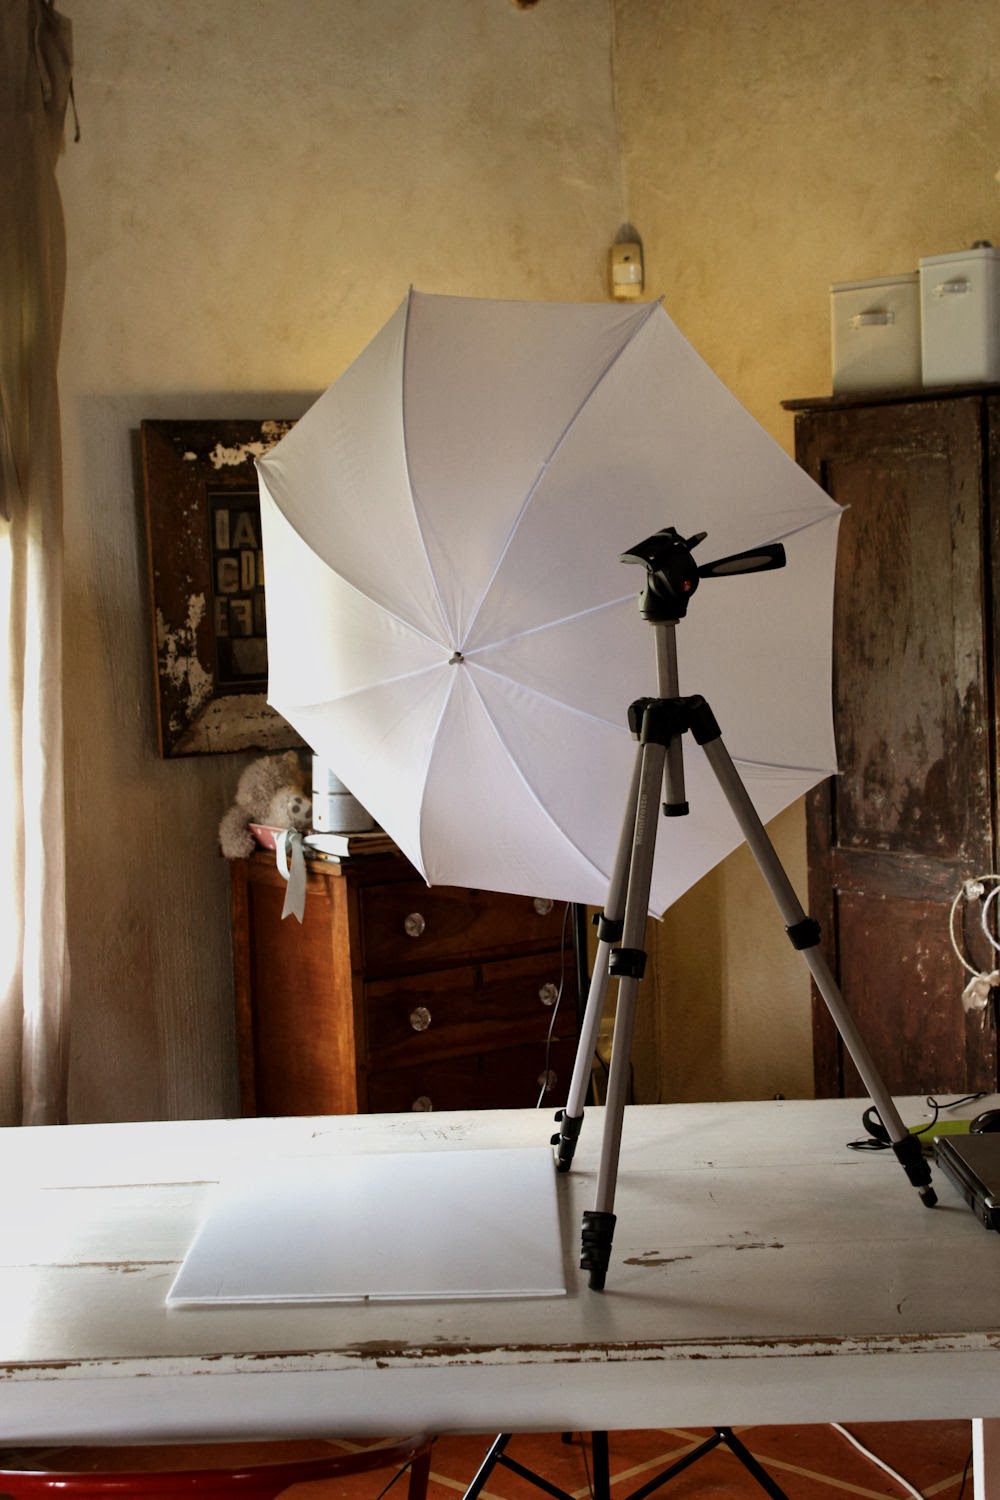
You can also use a tri-pod here (recommended) and a remote control for your camera. Position the tri-pod directly over your layout and then photograph it to avoid any camera shake and blurry images. 

After photographing the layout I upload it to my computer for editing. When taking the picture I try to make sure that the layout is straight but if it is off a little I have a “Straightening tool” and “Perspective Correction Tool” in my editing software to get it perfectly straight without any distortions. I crop and size my image for web with a 150dpi which is nice enough to see details but small enough not to load for ages (a pet hate). 

Now it’s time to get up close and personal and take some close up images to show details, texture and patterns or focus on something specific you used or want to show off. I normally use a Macro lens for this or simply turn my settings to “Macro” the little flower on your camera.
Photographing your layouts head-on 
Unlike above, in winter I photograph my layouts head on. I also attach my layouts to my white infinity curve board using mounting squares and then place the board on a window sill outside. The reason I do this in winter is because the lighting is very different to the harsh summer light and I have no issues with the sunlight ending up directly on my layout. I stand in front of the board directly facing my layout with feet apart to steady myself. I have a steady enough hand and just shoot away, but you could also use a tri-pod which is always better and recommended. Once I have my images I edit them for web publishing. Photographing your layouts head on is another option if you don’t have a steady hand or a tri-pod. I recommend this for most people – it’s a simple way of making sure your layout is straight and in focus. I have seen some amazing scrappers and bloggers with images that are always out of focus.
Some other tips 
I never use a flash when photographing my layouts – flash is a mood destroyer I always shoot in “P” Program Mode or “M” manual mode - this allows me to set the camera to specific settings, like ISO speed, Shutter speed, Aperture, White Balance (WB) [pull quote] ISO, Shutter speed, Aperture and brightness of light are variables. They will always change depending on the light and the shooting situation so be prepared for that Setting the white balance can help when photographing indoors to avoid things looking too blue. 

Shooting indoors you are dealing with “manmade lights” that will have an effect on your camera hence the blueness of a photo It helps to know your camera and how it works – changing settings and getting off of “Auto” is a must Invest in a tri-pod – it will be worth the money spent in gold And after all this – the best advice I have is, do not be in a hurry when photographing your layouts. 

Take your time and have a steady hand, wait for good lighting outside and keep a white background separate and don’t use it for anything but a background to keep it crisp and clean. Oh…and go and buy that tri-pod this year!

Dainfern Scrapbook Event 2014.

Due to popular demand we are back at it again
Dainfern Scrapbook Event 2014
Book now for a two day Scrapbook Event at Dainfern Clubhouse,
Dainfern, Gauteng for only R1750 with
Jowilna Nolte (from Scrapcouture) and Cariena Basson (from Scrapbook Studio JBay) 
Saturday 26 July and Sunday 27 July 2014

Schedule:
Saturday 26 July 2014
8am-8:30am Arrival & Registration
8:30am – 10:30am Session 1
10:30am-11am Tea Break
11am – 12:30pm Session 1 Continues
12:30pm-1:30pm Lunch 
1:30pm-3:30pm Session 2
3:30pm-4pm Tea Break
4pm-5:30pm Session 2 Continues
Sunday 27 July 2014
8am-8:30am – Arrival & Tea
8:30am-10:30am Session 3
10:30am-11am Tea Break
11am-12:30pm Session 3 Continues
12:30pm-13:30pm Lunch
13:30pm-15:30pm Session 4
15:30pm-16:00pm Tea Break
16:00pm-5:30pm Session 4 Continues
Deposit of R500 secures your seat followed by 5 payments of R250 - final payment 30 June 2014!

Join us for a day filled with Amazing New Techniques, Lucky draws, goodie bags!
There will also be lots of Retail Therapy!! For any further queries, please email events@scrapbookstudio.co.za

Couture Creations 2014 Design Team Audition.

Every now and again i forget how much i love my embossing and die-cutting - only for a brief moment until the next new amazing set of embossing folders and dies are released by companies like Couture Creations. so this is a reminder to you and myself of how much i love it...and a design team call they have put out. So if you love their products as much as i do then have a look at their blog for more details. These are only a few of my favourite projects created using their embossing folders and dies.
Their 3-in-1 die and stamp sets are amazing value and the opportunities are amazing! you can do so much with them, use them separately or with each other...

add colour and texture by adding other products into the mix - here i used my Artiste markers to add colour to the stamped and embossed images on my card
stamping onto patterned paper is a great alternative to plain cardstock...
combining stamps is always a great alternative to add interest to your work...
bright and beautiful inks make for a nice statement to a somewhat traditional stamp design.

On this gift box toppe i used an embossing folder to add detail to my die-cut flower
i love how the embossing just adds enough dimension and texture to add loads of interest to this simple project
a quick and easy way of jazzing up a special gift for a friend
i hope you are having a wonderful and creative weekend filled with cutting and embossing. thanks for stopping by and if you need more info on the design team call remember to pop over here

Petaloo Botanica Flowers Handmade Sweetie Jar

Have you laid your hands on this amazing range of new Petaloo blooms yet? Well let me tell you, there are flowers and there is something so beautiful it makes your heart flutter and skip a beat. Yes I have said this many times about scrapbooking products – but these are totally different. They are soft, delicate and life like! Too gorgeous for words actually – they are best touched and experienced for yourself. So this week I used them turn a little recycled jar into a sweet and delicate sweetie jar. I covered the base of the jar in some pretty Prima patterned paper using the amazing this to that sticky double sided tape. I only needed a few strips of this take to make it stick perfectly and permanently – really amazing stuff.
I then added some Petaloo Botanica flowers to the front of the jar. I grouped the flowers until I was happy with the look, and then adhered them using my Tombow Mono Multi adhesive. I added small drops of Tombow and let them dry to make it really tacky and then adhered the blooms while applying some pressure. This makes them set perfectly and permanently.  Lastly I inserted some more mini Botanica blooms where there were open spaces to fill in some gaps which gave me a really dense covering of beautiful blooms. I absolutely loved how it turned out.
The best thing is that even if I don’t want to use it as a sweetie jar anymore, I can simply remove the lid and use it as a pencil holder, pretty ear bud holder in the bathroom or anything else my mind can dream up – it really is that pretty all thanks to those beautiful blooming beauties from Petaloo.

I hope you have a blooming and creative day filled with buds.
Products used
Botanica Floral Ephemera – Ivory [C1100-200]
Botanica Mini - All Ivory [C1101-001]
Botanica Mini - Grey Blue, Purple, Green [C1101-004]
This to That Super Sticky Double Sided Tape - 1 inch x 5 yd [AC 61755]

American Crafts Toolkit - a must have for crafters.

As a craftsman (well women) I love a good tool. And if you give it to me in kit form even better! But the real bonus is when it comes beautifully packaged in a handy and sturdy tin. Oh and a little bit of pink helps too. This is what the new AC i-Tool kit offers you along with its super functional tools inside. This all in one kit is all I need when I need to create on the go. It has everything I need all in a very cute tin that is compact and travel friendly. I used this kit along with a single adhesive to complete my Project Life Cover page for 2014. I really needed nothing else apart from a few embellishments to dress up my page. I liked that I didn’t need a stack of things to be creative and didn’t even have to be at my usual work space to complete the page.

Here’s how I used the tools in my kit…

Embossing tool
I had a little PL card with a heart printed on it but apart from that it was pretty bland. So I used a little rub-on and added it directly onto the heart with ease using my embossing tool. This instantly gave my heart some character.
Paper Piercer
To further dress up my heart I used the paper piercer to make evenly spaced holes around the edge of the printed heart. I then used embroidery thread and a sewing needle to sew my heart in a bright pink thread to add some colour.
Hammer
I added a chipboard Prima element to a pink PL card using Tombow Mono Multi adhesive. I then made a small hole in the top edge using the hammer and eyelet setter with the hole tip on the front. I then added a brad. Opened up the legs on the back and hammered them flat to prevent them from catching on the pockets when I insert it. I also hammered the brad on the front to give it a well-worn and stressed look.
Eyelet setter
I again used the hole maker from the eyelet setter to create small holes directly onto a quote I printed. I then backed the holes using bright pink paper and adhered it to my green base paper. The pink is no visible against the green and makes for an interesting effect.
The rest of my page was completed with some sewing on my sewing machine, lettering and photos. All the cutting was done using the handy scissors included in the kit.
This makes for a really handy gift for anyone starting up a creative hobby like card-making, scrapbooking or even for back to school teenagers. I know my niece would love a kit like this. this is a fabulous gift and a must have for every crafter.
Products used
i-Tool Basics Toolkit [AC 400002]
Project Life Mini Kit - Childhood (100 Cards) [AC 380047]
Project Life Core Kit - Blush (616 Cards) [AC 380041]
Project Life Photo Pocket Pages - Design A (12 Pages) [AC 380004]
Tombow Mono Multi Glue [TB 62191]

Popular Posts

Like us on Facebook

Flickr Images