sketch 337 at scrapbook challenges.

it's time for another sketch over at scrapbook challenges - sorry for being behind on those postings too!i am still not any better and still no doctors' diagnoses! so i will just scrap myself better - cheaper option anyways! thanks for sticking around....
here's what i did with this week's sketch. it's a single page that i turned into a double with lots of white space. the photos are some of the scrapbook studio retreat held in February - and what a fabulous time of friendship we had.
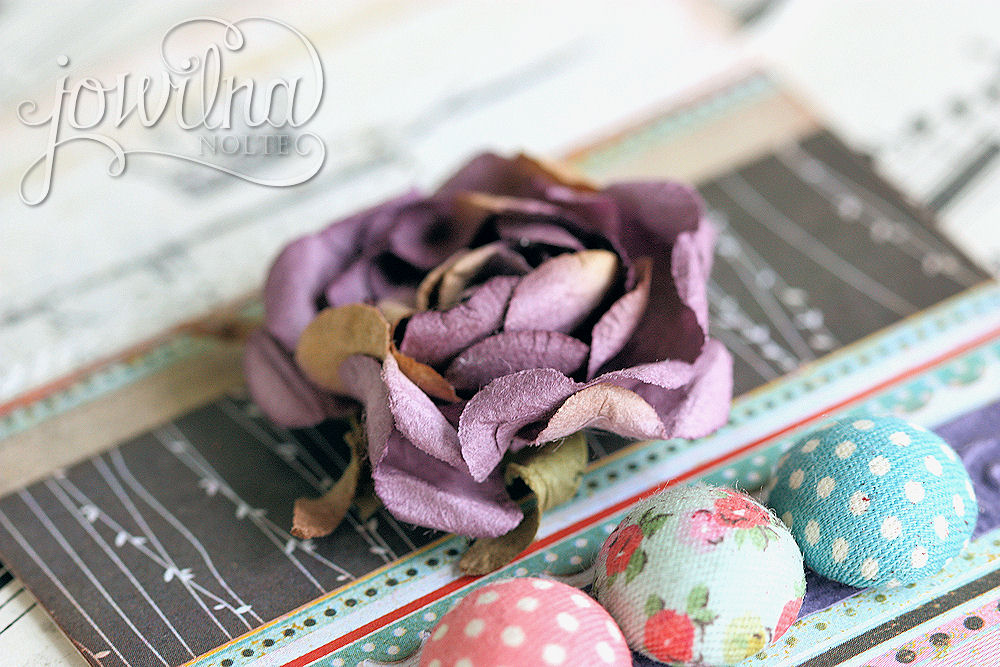
i used a combination of papers but the main piece of paper is the floral kaisercraft paper which i simply love. i love a mixture of colours and patterns and this is just so perfect.
i added some crate chipboard elements and some small punched flowers using the same paper.
and some stamped images using Versafine finished off with buttons, fussy cut flowers and more chippies. head on over here to see what the rest of team did and so see the sketch. join us next week for a fabulous new sketch and loads of inspiration.
here's to some rest and relaxation over the Easter weekend - He is Risen.

all aboard by docrafts - bouble page layout how to.

it's been a while since i have blogged -sorry for being absent without even a word!while returning from my travels and dealing with life i picked up a bug and 3 weeks later i am not better. so after antibiotics and lots of meds later it is back to the doctor today. so inconsiderate when life and crafting has to be done! any how - i have been busy and this layout is one of my favourites lately. it's one of those that when you start it you sort of have a plan and then it takes on a life of it's own and turns into magic where everything just falls into place and works. it's simple but effective and i love how everything just works together perfectly.

 For most people travelling is a big part of their lives – for me personally I think I love traveling more than most people but don’t get to do it often. So when the opportunity arises I want to capture those special moments in an equally special way. This is what I did with these photos from way back when – I was lucky enough to go on a cruise and visit the islands off the African coast. The photos was never really scrapped in a decent way and when I first saw the new All Aboard range of DoCrafts products I knew it was time to revisit some older memories. The colours and designs on this range of products are so versatile – ready and willing for any travel related photos to be scrapped beautifully.
the All Aboard range has the most amazing stuff in it, like these ribbon clips. they are so easy to assemble and the printed ribbons are simply gorgeous! they make for fabulous little touches to any project and can be done in seconds
i used my favourite go-to coffee AC cardstock to die-cut my title on my Cuttlebug
the range also has some beautiful washi tapes in it. here i used the washi tape and tore it into smaller strips overlapping them onto each other for added texture and interest
I used mister Huey inks and a large paintbrush loaded with water to create the splats directly onto my layout. they fit perfectly into the already stained paper in the range. for a detailed sxs explanation on how to complete this layout you can head on over to www.thewholesaler.biz/blog - but you have to share your layout with us so we can be inspired by your creativity! happy scrapping!

Products Used
All Aboard Travel Labels (24 Piece) [DPMA157189]
All Aboard 12x12 Paper Pack (32 Pack) [DPMA160143]
All Aboard Ribbon Clips (15 Piece) [DPMA356100]
All Aboard Patterned Craft Tape (3 Piece) [DPMA462200]
AC Cardstock Rocky Road 12x12 Textured Cardstock [AC NATURALS 71466]
AC cardstock White 12x12 Textured Cardstock [AC NEUTRALS 71081]
Mister Huey's Colour Mist - Classic Tan [AC 101102]
Tombow Mono Multi Glue [TB 62191]
Zots 3D 200 [TW 3786]

stuck on you - all about Tombow Mono Multi Adhesive.

One of the most important things in most crafts is a good adhesive. It’s not just important to own good adhesives, but also to know their characteristics and uses. Some adhesives will work really well for certain applications, and the same adhesive will be a disaster on a different material. Knowing which adhesive to use is just as important as knowing how to use it. Over the next couple of months we will share our most popular adhesives with you giving you tips and tricks as well as sharing some secrets with you about glues. For more on adhesives head on over here
http://www.thewholesaler.biz/blog/stuck-on-you-adhesives-part-1/
Tombow Mono Multi Adhesive 
Tombow mono multi adhesive is the best adhesive you can ever use for any project. It can bond in two different ways: permanent and removable. It will bond permanently by applying while the glue is still wet, and is removable when you leave it to first dry before positioning. The glue has dual applicators for ergonomic dispensing of the glue – a large broad tip at the bottom and a small pen tip for smaller areas and fine lines. When used right the applicator will not clog. 
In short 
• Bonds two ways 
• Two tips 
• Photo-safe, acid-free 
• Use right from the applicator to insure a permanent bond 
 • Achieve Post-It-Note-like temporary bond by allowing glued project piece to dry before attaching to the layout for ultimate scrapbook repositioning 
 • Non-toxic, acid-free; washable. 
 • Ideal for paper crafting
 For permanent use 
1. Apply glue moderately to paper or element to be adhered 
2. Attach while the glue is still wet for a strong and permanent bond 
3. Replace the cap when you are not using the glue


For repositioning 
1. Moderately apply glue
2. Allow the glue to dry for about 2-3 minutes 
3. Attach the paper or element, remove and reposition as needed 
4. Replace the cap when you are done using the glue


Products used
Tombow Mono Multi Glue [TB 62191]
Ruffled Roses – Plum [C1833-205]
Serendipity 6x6 Paper Pad [BG 3733]
Memories Double Sided Paper – Dots [TC MEM105]
Knock Outs Border Value Kit 2 [AC 63014]

Everything on my tag was adhered using Tombow Mono Multi adhesive: cardstock, patterned paper, flowers, metal covered buttons, diamante and even Cuttlebug embossed cardstock

how to use Knockout border punches.

The versatility of punches is clearly visible once you start playing around with them in your projects. But when I first saw the Knock outs Border Value kits I was totally sold. I love the way you can have a single base punch and interchangeable snap punch and wing sets that you can change as your mood changes. 
You can buy a kit or several snap punches that are sold separately and build your own collection as your crafting needs change and evolve or as your budget allows. These punches are great value and excellent quality and will make for interesting texture and patterns on your cards and layouts. 
For this card I used 3 different border punches together on a single card. I punched the borders on different patterned papers and then overlapped them onto each other to create a dimensional effect. These punches are perfect to add interest to your paper scraps and they in return can be used to create stunning projects that are frugal and stunning.
 How does your knockout punch set work? 
The punch base is sold in a kit form with a selection of 6 different border punches that can be changed around using a single base. 
The punches consist out of 2 matching wing guides and a punch. 
Slide the wing guides into the base and then the punch in the middle. 
Insert paper into the punch and press down to punch the shape. 
Slide the paper down and line up the punched edge to the guides and punch again, keep going until the entire border has been punched. 
 The advantages of the knockout punch sets are that they can be stored without being bulky like many traditional punches – you need one base and the actual punches can be kept neatly and compactly in a drawer, shelf or box.
Tip Never punch thick cardstock or paper with your punch as it may get stuck, jam and even damage the punch. To maintain your punch and sharpen the edges punch through tin foil to sharpen the edges.
Products used 
AC Cardstock White Knock Outs Border Value Kit 2 [AC 63014] 
Kaisercraft 75 Cents Collectables [KCCT743] 
Kaisercraft 75 Cents Double Sided Paper – Dime[KCP1039] 
Kaisercraft 75 Cents Double Sided Paper – Penny [KCP1040] 
Kaisercraft 75 Cents Double Sided Paper – Tuppence[KCP1044] 
Kaisercraft Bird Cage Clear Stamp [CS800] 
POW! Glitter 12x12 Cardstock - Black Dots [AC 71598] 
Zots 3D 200 [TW 3786]

colorcombos galore challenge #234.

so i love color and texture! i have been trying to play along with the challenges over at 
and love how easy the challenges are! the nice thing about these challenges are that they are quick creativity enhancers - when you are feeling not so creative and just need a quick project to inspire yourself again...this is the place to be.
this is the beautiful color combo inspiration board. for my tag i was inspired by the colors, the powders used for the techniques, the pearls and flowers, the texture and the compass image. so i threw them all together into a single tag and love the end result.
for the silver in the inspiration board i used silver micro-beads and a silver diamante.
i used perfect pearl powders to color embossing powder and then embossed the background paper to add some texture. some pearls and flowers add some more color and texture...
you can play along or head on over to color combos galore for some stunning inspirational photos and projects.

mixed media canvas.

things are slowly getting back to normal and into some kind of routine after a hectic 2 weeks of traveling, teaching, parties and more scrapbooking events. but it's all good and i love it. the only negative is that you have to get back into normal/diet eating habits, design team responsibilities that have gone astray along the way and the mundane like washing and packing the dish washer.but God has been good and this year seems to be better than the last couple. God is good in so many little ways and then in so many miracle BIG ways. I think it also has to do with a change of mindset from my side. i will no longer be abuse and used and take a back seat to those who think they are better than everyone. we all deserve a piece of the sun! one of the projects i have done lately and am  very proud of is a specially designed mixed media canvas for Scrapbook Studio JBay's Retreat. I love how this canvas turned out. it started off slow and then turned into this thing i love with all my heart - it's amazing what paint and Mister Huey inks can do for the soul!
the base of the canvas consists of patterned papers that are covered up in a process of layering. the girls were totally freaked out but in the end the result was spectacular. some punched flowers with beaded centers.
beautiful prima flowers for a touch of the unexpected
old rusty nails straight from the farm shed combined with delicate ribbon and lace
hope you have a wonderful creative week filled with blessings. i am blessed each and every day! 
my totally messed up story is worth telling....this is what scrapbooking is doing for me this week!

Popular Posts

Like us on Facebook

Flickr Images