DIY Birthday – The Wholesaler turns 10.

As part of The Wholesaler’s 10th birthday celebration, we are celebrating in style with a spectacular gold theme. Gold elements are so much fun to work with and sourcing pretty gold elements is part of the creative process.
I knew that I wanted to celebrate with some beautiful cupcake liners. And the perfect way to create custom gold liners was to cut them on my Silhouette CAMEO machine.
To showcase my cupcakes, I placed them on a yellow/gold paper plate and sprinkled some gold glitter around the cupcakes. Some pretty candles finish off the cupcakes.

 I worked with plain white cupcake liners and then added a layer of gold ink to them. By combining a light misting of Gold Foil Color Bloom spray, then a layer of water misted onto the ink and then small drops of All Purpose ink, I was left with a spectacular gold marble effect. Two shades of gold – perfect for a celebration!
step 1 - Cut a variety of cupcake liners on your Silhouette machine.
step 2 - Use a combination of Vegas Gold All Purpose Ink and Color Bloom spray to add a gold layer of colour to your cupcake liners. Leave them to dry.
step 3 - Fold the cupcake liners and attach the ends together so that they fit snugly around your cupcakes.
 These cupcakes are perfect for a whole table of celebratory elements.
Next I added a pretty recycled bottle to hold the drinking straws on the table. This is such a fun element to make. Wash and remove all the labels from an empty drinks bottle. Cut down gold balloons and then pull them over the bottom of the bottles to look like a gold dipped effect. Paint can be so messy and so this is an amazingly easy alternative that is not messy at all. I added some white stars to the balloon dipped bottom that I had left over from cutting my cupcake wrappers.
So in the end everything finds a place and can be used to celebrate! A DIY Birthday made easy…

Card & Layout | Butterfly Card Inspired By A Layout

Inspiration is everywhere, and with Lady Pattern Paper having a cardmaking competition, I can’t help myself but feel the urge to make some more cards. I love making cards because they offer me a creative outlet that is not so time consuming as a layout or canvas. So today I am sharing a layout and a card – the card was purely inspired by the butterfly on the layout and of course I had to use the beautiful butterfly paper.
The butterfly design was inspired by the butterfly flair used on my layout. The other elements were inspired by the Lady Pattern Paper papers used for matting my photo and for the detailed strips on the background.
step 1 - Select the 2 patterned papers you want to use as your background.
step 2 - Adhere the 2 pieces overlapping each other using double sided tape.
step 3 - Using some of my left-overs from last week’s layout, I cut two squares. One with paint details on it and a second larger matt using the beautiful Kraft dot paper.
step 4 - Adhere the background piece to a folded card front. Adhere the pink paint matted piece to the centre of your card. Add some paint splats to the background for added interest.
step 5 - Stamp and colour a butterfly image using matching colours.
step 6 -Add a layer of dimensional glaze to the butterfly.
step 7 - Lightly sprinkle the butterfly with the wet glaze with gold glitter. Leave the glaze to dry and shake off the excess glitter.
I finished off my card with some cut circles, diamanté, and sewing around the outer edge.
Products used:
irRESISTible Texture Spray Copper IR-000-094
irRESISTible Texture Spray Sweet Plum IR-000-506
Brilliance Dew Drop Pearlescent Chocolate BD-000-076
LPP0004 Basic Essentials Script - Intense Teal
LPP0007 Basic Essentials Sheet Music - Pink Mary
LPPK0005 Kraft Essentials - Script - Opaque White
Other: diamante, stamps:Prima; Glitter:Prima; Sewing machine; dimensional glaze; butterfly flair; paint; gesso; watercolour paint; paintbrush

irRESISTible Art Journal Page | Imagine Crafts.

Over on the Imagine Crafts blog....
am in love with my Art Journal these days! I just love playing and experimenting with my inks and different mediums on the pages, my favorite of these is the Imagine Crafts range of products. Today I am sharing some ideas on how I incorporate different mediums with some shine on my art journal page.
 hop on over to the blog for loads more inspiration and a step x step on this page http://imaginecraftsblog.com/2016/03/23/irresistible-art-journal-page/

POP Paint Card | Artistic effects using paint.

Hello there, today I am sharing this wonderful and simple card made using my range of POP paints.
Yes – it is that versatile and simple.
The stamped sentiment on the card reads:
Sit in reverie, and watch the changing color of the waves
that break upon the idle seashore of the mind


It all started with a bit of an experiment and turned into this fun and artistic background.

step 1 – Select your colour of POP paint to use, a craft sheet, medium paintbrush and water.
 step 2 – Add some paint to your craft sheet using the paint brush.
 step 3 – Mist the paint with water. Use the paint brush to mix the water into the paint to form a liquid. You don’t want it too runny.
 step 4 – Dip your water colour paper into the paint. I let my first colour (blue) dry first and then dipped it into the red.
TIP: to get a lighter shade or red, add more water and then dip your paper into the paint.
Use a heat gun to dry the first layer of paint. Then dip the card again into red with less water for a darker shade.

step 5 – Leave the paint to dry. Trim the paint dipped piece smaller and adhere to the front of a card.

 You can have loads of fun creating patterns and effects using the range of POP paint colours.
Perfect for your next scrapbooking or art journaling page.

DIY Easter | Décor, Blooms and Printables.

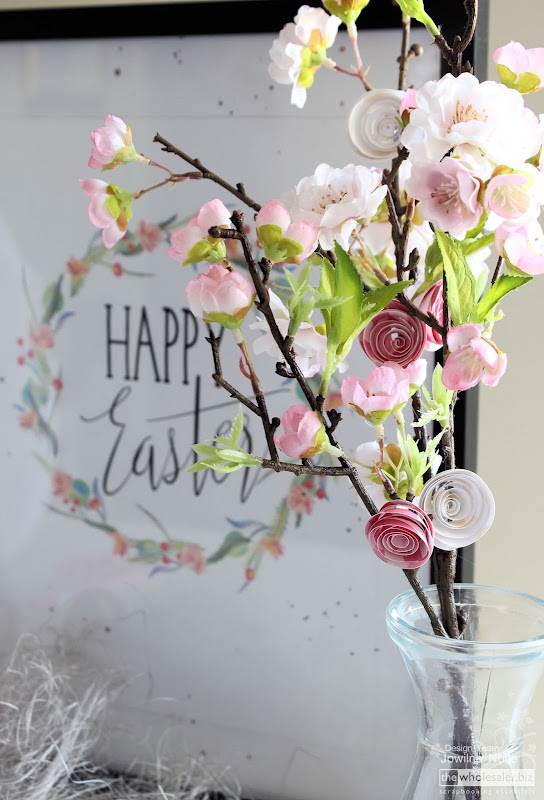
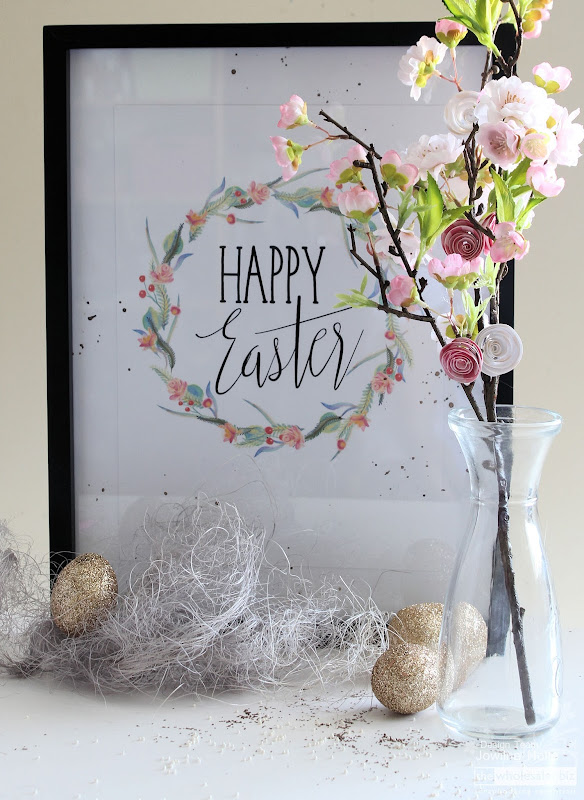
As part of my Easter décor, I am creating vignettes combined with beautiful delicate blooms and some gilded Easter eggs. The combination of elements together makes for a pretty visual around the home celebrating the festivities.
bought a blossom sprig from a florist and added my own paper blooms in between them to make a pretty visual. I like combining paper with other elements for a truly unique look. As part of the look, I also designed a pretty Easter wreath that you can download and print for free as part of your home d̩cor. I added mine to a simple sale frame bought from Mr Price РI keep on recycling my frame with different printables around my home.


*To download the printable, click on the image hereunder to enlarge it, then right click and select ‘Save image as..’
step 1 - Freehand cut some circles out of pattered paper. You can use a circle punch as well or even a die-cut.
step 2 - Cut a swirl into the circles. I just eyeball them and cut them freehand.
step 3 - Use a quilling tool and start rolling your flower from the outside inward to the inside.
step 4 - Adhere your paper blooms to the blossom twig using a hot glue gun. Careful not to burn your fingers while adhering them.

Kaisercraft | DIY Wedding Part Two – Stationery Set

The fun and creative part of planning a wedding is making your invitations and stationery. Your invitations and stationery will set the scene and mood for the entire day, so it is important that you know what you want.
For this sample I chose a modern romantic theme. The pretty paper and elements are the romantic part and the actual font and design used is quite modern. Together they make for a beautiful and timeless design.
The invitation bundle is tied together with a classic silk ribbon over a black paper wrapper and finished off with a monogram element. Included in the bundle is the invitation and RSVP card and save the date card as a reminder for the important date.

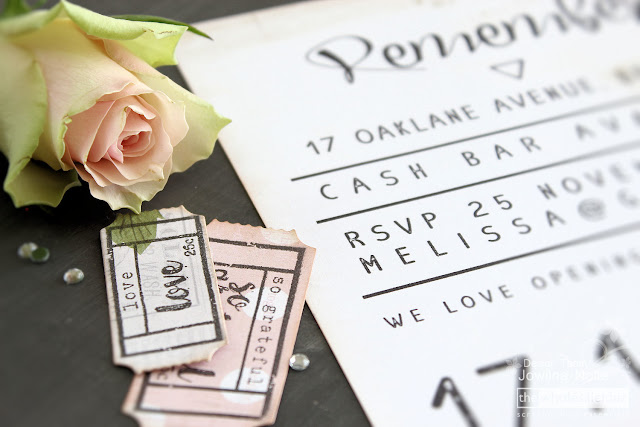
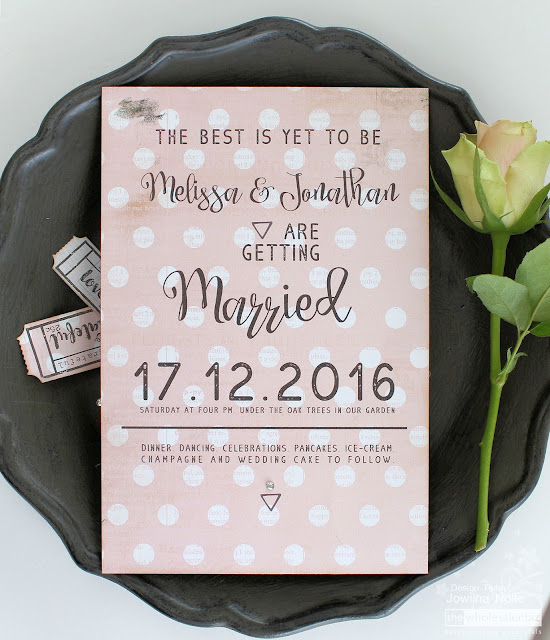
 The front of the invitation is printed on the pink dot patterned paper. The modern design is clearly evident by the fonts used as well as the graphic elements like the solid black line and fun triangle. A single diamante adds a nice and classic finishing touch.

  The back of the invitation is printed on a matching paper from the range sporting the romantic rose element in the top right hand corner. The same fonts, design elements and groupings were used for the back design.
 After the invitation and RSVP card and reminder cards comes the fun part – Following through the theme and design into some other elements that can be used throughout the reception. I was so excited by this amazing new die-cut that I simply had to use it.
I created a beautiful serviette wrapper using the ‘thanks’ die cut.
 Use a small piece of washi tape and adhere the die to the patterned paper you want to use. Trim the die-cut strip down to fit onto the black paper wrapper. Adhere the die-cut so that the black shows through, and then adhere a printed strip just below the die-cut word. Wrap the strip around the folded serviette and then add the same black silk ribbon that was used on the invitation.

 And now your DIY wedding part two and all the elements for a beautiful modern-romantic celebration are well under way.

Products Used


Lady Pattern Paper | Anatomy Of A Single Page Scrapbook Layout.

By now the entire scrapping and card making community is abuzz with the new range of Lady Pattern Paper Kraft Essentials. They are simply amazing and I am so chuffed to get to work with this amazing range – classy, elegant and neutral. Everything a girl could want!
I created this fun and simplistic single page layout to feature the Kraft paper as a background. I worked straight onto what-must-be-my-favourite-design-ever! Here’s a step x step Anatomy of the layout and how I created it.
step 1 - Apply a generous amount of Gesso to the background using a pallet knife. Let the Gesso dry completely or use a heat gun to speed up the process.
step 2 - Use a bright pink acrylic paint and add a layer of paint over the Gesso. Leave the paint to dry.
step 3 - Make sure you spread the paint out to a thin even layer using your palette knife. Do not cover the entire layer of Gesso.
step 4 - Once the paint is dry, use a dark brown ink and stencil a pattern onto the background.
step 5 - Use a small paintbrush and watercolours and add splats to the background.
step 6 - Select another pattern (copper dot) and cut a corner off the page. Adhere to the top left hand corner. Trim the edge using one of the barcode strip.
step 7 - Select your photo, title and other elements you want to use on your layout. Position them until you are happy with the look and then adhere them in place.
Embellish to finish off your layout.  And there you have a stunning and creative single page scrapbook layout using the beautiful new Kraft Essentials range from Lady Pattern Paper.

Popular Posts

Like us on Facebook

Flickr Images