Chiswick - stickers and creative borders on a card.

I love making quick cards – they are fun, versatile and have a really purpose. Giving someone a beautiful and thoughtfully made greeting card is priceless and shows effort! So for this card i grabbed some beautiful and versatile stickers from the Chiswick range to add colour and patterns to the front of my card. Stickers are effective when grouped together closely to form a visual point – from there you can add other elements that will guide the eye to different positions. To create further interest to my card i used the zig zag blade for the easy cut trimmer to cut a strip of patterned paper with a beautiful edge – this will change an ordinary border into something special in one easy cut! That simple!
 I added loads of colour using my stickers and chipboard elements from the Chiswick range – these are perfect for modern and funky birthday and greeting cards.
To add a bit of sparkle and extra funky appeal to my card I added pink flowers and added glitter brads to the center of each flower to finish them off nicely. I love how the pink glitter just adds that element of surprise.
And a card will be quite boring without some wording – for this card i added a phrase from the die-cut sticker sheet “Familiar phrases” and then cut the ‘so’ off so that i only had ‘brilliant’ left – by altering ready made elements you can make them style specific and customize it to suit your needs.
The decorative edge makes for a nice statement just above the bold black sticker border. The zig zag shape is a nice repetition of the larger scallop edge on the sticker, adding lots of interest and contrast while softening an otherwise hard straight edge.
To cut my zig zag edge was so easy – all i had to do was replace my regular stright blade in my trimmer with the zig zag blade and make the cut.
The blade snaps easily into the guide track – did you know that you can also replace your straight cut blade with perforated, fold scoring or wave cut – which means your trimmer become multifunctional in a few easy steps
Here you can see the zig zag cut made on the patterned paper – different papers will show the edge more clearly as you can see here. The lighter your paper or cardstock, the more evident the cut will be.
And that is how easy it is to use the easy cut trimmer from Chiswick to add loads of interest to your next craft project.
All these wonderful products are available from Chiswick – to locate your neasrest craft store you can contact Denise on 031 – 569 6116 and for a full overview of products head on over to the website

I hope you feel inspired to pull out those extra blades for your easy cut trimmer and add a little pizazz to those otherwise straight edges. Happy card making!

Couture Creations - double page layout with die-cuts and embossing.

Welcome to another Couture Creations post- this week i played with some more gorgeous die-cuts to add some simple elements to a double page layout. I love how simple it is to dress up your projects with a beautiful die-cut. The latest themes and designs are amazing and so versatile. I also used some gorgeous papers from the So Jew paper pad to add patterns and colours to my layout - i did combine it with some other patterns and colours for a beautiful and vibrant look.
i also added some embossing using this beautiful embossing folder from The Marriot Collection - Abbey Road. I used a printed card element and used only the top corner of the embossing folder to add texture to it. I then used my sponge dauber and some dye ink to lightly add colour to the top of the embossing highlighting only the selected area.
I used the Lady and Gentlemen dies and embossed them in a dark brown chocolate embossing powder for colour. I embossed them twice to give a nice solid colour and a smooth effect.
The Paddington street lamp was my other die-cut turned embellishment. I embossed it in the same dark brown embossing powder as the lady and gentlemen  but added some additional colour also using heat embossing. I also added some of the Couture Creations gemstones to my flowers - a girl can never have enough bling!
Here's how i added additional coloured embossing
1. die-cut the street lamp out of smooth white cardstock
2.emboss the lampshade using dark brown embossing powder. A detailed embossing powder works better because of the intricate details on the die.
3. use an alcohol based ink to colour coarse white embossing powder - i used a green colour. let the alcohol ink dry and evaporate - this means that you simply have to leave the embossing powder to dry really well before using it.
4. heat set the coloured coarse powder and see how it turns the lamp post into an old rusty metal with a great patina added to it over time.
see how one layer of embossing looks against a double layer of embossing - a nice smooth layer and well worth the effort.
i used these wonderful products from Couture Creations for my layout

The Wholesaler - Ten minute cards with Couture Creations embossing foldes and paper pads.

For me card making is something that I can do without thinking too much – 
it’s that crossover-in-between thing I do to help get the creative juices flowing again 
and a time of no rules and anything goes! 
So what better way than to make some ten minute cards where I can produce something worthwhile but not take up too much time out of my day? I make cards that will not take me longer than 10 minutes to actually put together (this is of course without the time I spend procrastinating and thinking about what I want to do) – the other 50 minutes I spend digging through my stash to decide what to use, oh and finding things I have long forgotten about! 
But with the new Couture Creations Paper pads all the stash I need I can find in one convenient place – the beautiful designs and colours all work together making card making such a pleasure. And throw in a new embossing folder or two and a couple of embellishments and you have all you need to create with – so no more excuses to not make cards. All it takes is a few minutes and limited stash!
Here’s how I made my cards…
  • I pulled three pieces of paper from my paper pads that I really loved, one matching coloured AC cardstock and some white background for my card bases. Grabbed a couple of Prima brads I have had for years (embarrassed face here), some buttons and diamante and thread. 
  • Found two embossing folders I really liked and collected my Cuttlebug. I randomly cut four pieces of cardstock to form my cards. 
  • Then I cut the patterned papers into smaller pieces and just started putting things together – once I was happy I inked the edges and adhered the elements together. 


  • I did play around with the embossing folders – I simply inked the embossed areas using a dark brown ink pad using a sponge applicator to highlight the edges. 
  • A couple of embellishments, stickers and rub-ons also found their way onto the cards as focal points. 
  • To pull through the acid yellow from my brads, I used yellow watercolour paint to add splats onto my background papers to tie everything together.

  • And that is how simple it is to make a couple of cards in less than an hour using the Couture Creations Embossing folders and paper pads. Everything is so quick by just adding a few pieces of interest to your cards like the embossed papers and cardstock!
  •  And remember the paper in the paper pads are all double sided, so you can get away with even less stash to make some beautiful cards. Happy card making everyone!

Products used 
Couture Creations Embossing Folder Project Journal Cards [CO723625] 
Couture Creations Embossing Folder Asian Wave [CO723630] 
Couture Creations 12x12 Paper Pad - Damask Delight (48 Sheets) [ADCO 723545] 
Couture Creations 12x12 Paper Pad - Sew Jo (48 Sheets) [ADCO 723547] 
The Optimist Wood Icons in a Box [PM 572471]
 Memento Dew Drop Ink Pad - Rich Cocoa [TMD-800]

Chiswick - how to cut circles using a Swivel cutter.

Welcome to another Chiswick post. This week i am focusing on their amazing little Swivel Cutter. The swivel cutter is made to, and allows for easy cutting of curves, circles and other designs out a variety of lightweight materials such as paper, vinyl and plastic. The cutter has a 360 degree swivel blade that also allows for easy cutting inside of templates. I love circles and so the swivel cutter is an important part of my basic tool kit. I used the swivel cutter to cut an accent circle over my photo on my layout - this draws the attention to my photo and also helps with visual flow of the layout.
I used the swivel cutter together with my stencil to cut a border circle. I also used my paper distresser to add some distressing to the outside of my cut circle. After i adhered the circle to my layout i also added some coloured hand sewn detail.
some die-cut elements out of the basic cardstock range available from Chiswick works really well for thin intricate dies. I also used the swivel cutter to cut out my stamped leaves on this layout - it made it really easy to cut out and navigate around the tight corners.
more sewn details of my cut circle
to add colour to my layout i used some of the Chiswick ink pads to stamp a leaf design onto plain cardstock, and then added some clear glitter for a shimmer effect
The Swivel cutter comes packaged with 2 extra blades so you will be covered for a little while before having to buy more replacement blades - the replacement blades are easily available from your local craftshop
Position the blade the right way inside of your circle stencil so that the cutting part is facing towards you
place pressure onto the blade and then pull it towards you in an even motion
the blade will move around the edges of your stencil and change direction as it is needed. this give you a continues action and a clean cut without having to lift your hand each time you need to change direction or go around a corner. To view all the available products from Chiswick, visit their website www.chiswick.co.za - and to find your closest craft store you can contact Denise on 031- 569 6116

The Wholesaler - layout featuring Secret Treasures Dies.

I am a paper scrapper at heart – so there’s something really special about being able to create elements using just paper for cards and layouts. Above anything else I choose to use paper on my layouts with a few smaller embellishments, but ultimately paper rules my creativity.
I combined some of the beautiful die-cuts and chipboard elements alongside texture paste and paint on the background of this layout.
 So naturally when I create dies is one of my favourite elements to include. I can use small scraps of paper and cardstock to cut different elements out of to add as accents on my layouts, I can add different techniques to plain pieces of cardstock and I can dress them up or down as much as I like to.
For my layout I chose to emboss my die-cuts – this enabled me to pick up on the beautiful and dramatic turquoise-green in the patterned paper I used, and also the neutral brown I used as my matting to ground the elements. I used three different dies on this layout to add to my outdoorsy feel. I used the beautiful rocking horse die, tiny birdies and the beautiful large leafy die – all of them perfectly fitting into the design in their own unique way dressed up in a shiny new coat of heat embossing

Die-cut your elements out of plain white cardstock of medium weight
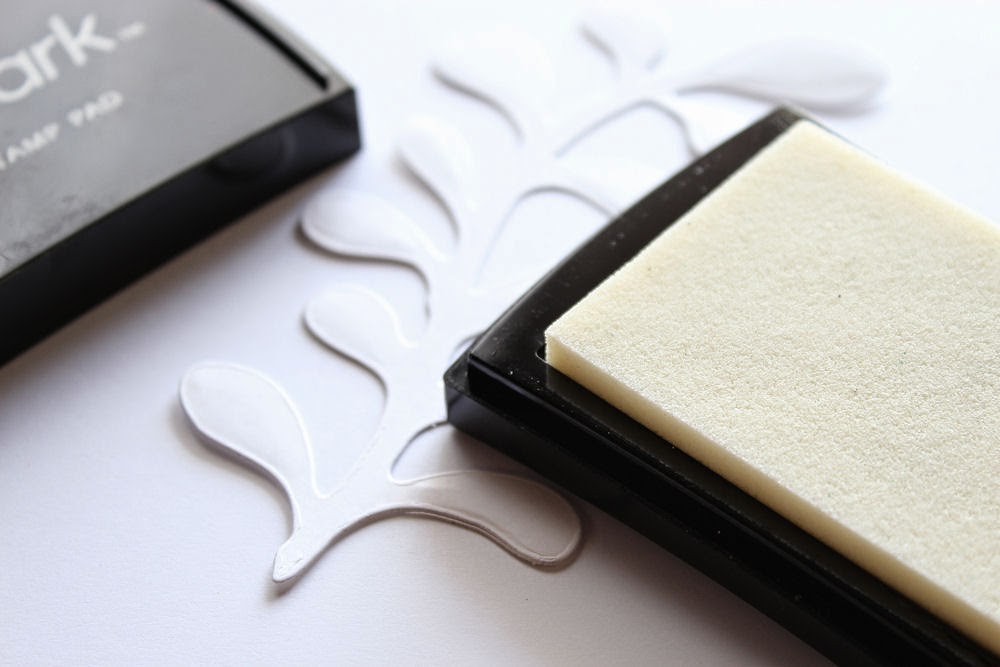
Cover the entire element with a layer of Versamark ink. Press the ink repeatedly onto the die-cut for an even cover of ink. Work on a sheet of scrap paper for the inking part or on your craft sheet.
Move the die-cut onto a clean sheet of paper and cover liberally with embossing powder. Shake off the excess powder.
Heat the element using your heat gun until the powder is fully melted. Leave to cool down before handling the die-cut. You can add another layer of embossing for a really smooth finish.
Tips and hints

  • Embossing two or more layers will give you a really smooth finish
  • You can decant your embossing powders into small plastic tubs with a plastic spoon making it easier to use. I store my powders this way so that I can easily return the excess powder into the container. Spooning the powder onto your elements over the tub also makes for less waste
  • The golden rule of embossing can be applied to most embossing powders – when it goes shiny, it is done heating.
  • Once an element has been embossed, the embossing powder needs to cool down before handling. If you touch it while the embossing is still hot, you will leave your finger print behind with a really unpleasant burn
Products used
Couture Creations Secret Treasures Collection: Rocking Horse [CO723518]
Couture Creations Secret Treasures Collection: Bird Song [CO723522]
Couture Creations Secret Treasures Collection: Panama Branch [CO723529]
Crate Paper Oh Darling Accent Stickers [683381]
Crate Paper Oh Darling Dainty Darling [683373]
Crate Paper Oh Darling Sweetie Pie[683369]
Crate Paper Oh Darling Dress Ups [683368]
Crate Paper Oh Darling My Girl [683370]
Crate Paper Oh Darling Chipboard stickers [683383]
Crate Paper Oh Darling Standouts [683390]
AC Thickers Baby Boy [732452]

to find your favourite goodies visit www.thewholesaler.biz and have it delivered to your favourite craft and scrapbooking store!

Popular Posts

Like us on Facebook

Flickr Images