Secret Scrapbook Event | Couture Creations & The Wholesaler

It's been a while - well 3 weeks since I blogged. With good reason. I have been off teaching at the Secret Scrapbook Event sponsored by Couture Creations & The Wholesaler and presented by Scrapbook Studio. Thank you for giving me the opportunity to share my life and passion with the delegates - sharing my God given talents with them. I am blessed by what I do and hyave done for past 20 years! What an amazing event it was, taking us from Cape Town to Pretoria, to Johannesburg, Bloemfontein and then down to JBay for the final leg.

We laughed, I cried, we ate like piggies, we scrapped, we coloured, we cut and we made memories.
We had a great time but I am happy to be home, catching up on mails and work and getting creative again. So for now I leave you with this amazing image taken in Cape Town and then the one below on the last leg of our journey in JBay.
Thank you for hanging around while I was away! I will be back with loads of exciting news happening around here! Until later ....

Couture Creations 2016/17 Design Team Audition

I have had the honour and privilege to design with Couture Creations products for the last couple of years and just love how their stable has grown with not only the basics but with some really cool die cuts and embossing folders, not to mention the amazing new Go Cut and Emboss machine. So it would be fun to be a part of this amazing team once again, and maybe even travel to down under to teach a few classes :-) - not that sounds amazing!
so I am sharing some of my favourite projects created with their range of dies and embossing folders...
a beautiful baroque looking altered tin...
ten minute cards with embossing folders
texture - simple and elegant but also very effective
having loads of fun combining different embossing folders all in one card - love this!
and die-cuts on a layout - easy and effective to add texture and dimension.
and just so much of prettiness - perfect for a lovely mother's day card don't you think?
And that's a wrap of some of my all time favourite die-cut and embossed projects using the gorgeous range of Couture Creations products.

Hello crazy beautiful world!

well what can I say - I have had a whirlwind month of October and then November started off with a fabulous teaching trip meeting some beautiful creative souls and ended up with a car accident that has left me well....a little fragile, bruised and just plain hurt! So needless to say I have neglected my posting on the blog and have fallen way behind on things that I have to do. But I am fine and will just keep on going. So my apologies for leaving you high and dry without any new reading material - I promise I will do better!

To start off I am on the Imagine Crafts Blog today with a fun Vintage inspired Christmas card.
So head on over to the blog for some inspiration using the amazing products by Imagine Crafts and Tsukineko!
I truly love how versatile their products are - and the world of creativity it inspires!
and if you are in South Africa, remember you can get all your Tsukineko inks from The Wholesaler or your nearest craft store!
#TheWholesaler #Tsukineko #JowilnaNolte #Scrapcouture #CoutureCreations #ImagineCrafts

Tomorrow I will be back with a Christmas inspired Bunting - and if you can't ait head on over to
The Wholesaler to view it today!

Have you booked?

It's been a while since I have blogged - i took a few personal days and look its all still here! thanks for hanging around though! In the meantime I did a lot of catching up on random things. But.... just wanted to hop in today and say
HAVE YOU BOOKED?

Have you booked your seat for this Event? So excited to be part of this Scrapbook Studio Event – Couture Creations is a great International Scrapbook Company whose products are distributed by The Wholesaler in South Africa!
Book TODAY by just clicking on this link
http://bit.ly/Secret-Scrapbooking-Event

Couture Creations 2 Way Glue – A Sticky Affair!

Are you always getting stuck looking for a really amazing adhesive? Well we have some amazing news for you. Today we are introducing the new Couture Creations 2 Way Glue pens – giving you twice the solution to sticky messes.

I tested the glue pens on a quick tag I made using some of my favourite products from The Wholesaler. I used the larger pen tip as a wet permanent bond glue for my larger elements and matts, and then the smaller pen for my fussy cut elements that I wanted to be repositionable. Both options that I like having in my bag of tricks.
Step 1 - Cut out images from printed paper, journaling cards or use photos for your project.
step 2 - Use the large 2 Way glue pen for the large pieces you are adhering. TIP: To start off using the glue pens, you need to push the pen tip in several times to activate the glue. The pen tip will become white as the glue seeps into the nib.
 step 3 - The large pen tip is perfect for adding adhesive to larger pieces like photos, journaling cards and other flat elements. The large tip spreads the glue evenly in a thin layer.
step 4 - Add glue to the postcard element using the large 2 way glue pen.
step 5 - TIP: I used this glue wet. Adhere the element to brown cardstock while the adhesive is still wet for a permanent hold.
step 6 - Use the smaller 2 way glue pen with the small nib for smaller cut out elements for detailed work.
step 7 - Add glue to the cut out elements using the glue pen and set them aside to dry first.
 Once the glue is dry adhere the elements to your decorated tag – I can move the elements around until I am happy and then leave them in position to dry for a permanent hold.
TIP: The 2 way glue is really great for people who battle using very wet adhesives. It enables you to let the glue dry first before committing to placement on your project, and lets you move things around for that perfect fit. Giving you time to adjust certain elements will take the stress out of getting things stuck.

Make sticky die-cuts with the Xyron Creative station.

In the build up to Father's day I created these quick and easy gift card envelope using my Xyron Creative Station. I used my Permanent Adhesive cartridge to add adhesive to my cardstock before die-cutting some delicate and detailed words. By adding the adhesive first and then cutting my words, I avoid a mess trying to get adhesive onto my words afterwards. So quick and easy!
It’s that time of the year that we are celebrating dad’s all around thew world – your earthly or heavenly Father – we all have one or know one that has blessed our lives with goodness, kindness and love. So create something to celebrate him, or just spoil him with something special.
Here’s how…
Step 1 – Take some white cardstock and add colouring using inks and mists.
Add the permanent adhesive cartridge to your Xyron Creative Station.
Step 2 - insert the coloured cardstock face up through your Xyron – remember the adhesive is added
to the bottom part so whatever you want to be visible needs to face upwards.
Step 3 - Remove the plastic piece from the front of your coloured cardstock piece.
Position the die you want to use to cut your words onto the coloured and now sticky backed cardstock piece.
Step 4 - Send the die and cardstock through your die-cutting machine to cut the words.
Step 5 - Carefully remove the cut word from the backing sheet.
TIP:
The die-cut word is now cut and has adhesive on it – you can simply adhere it to your project.
This is an amazing way to add adhesive to those delicate and detailed die-cuts without adding glue after cutting them – no mess and no fuss.
TIP: Do not worry if the word does not cut right through the plastic backing at the back. All you need is for the die to cut through the cardstock.
You want the adhesive on the back of the cardstock that makes adhering ithe words really easy.
I love how the Xyron makes my creative life so much easier – I don’t have to battle with delicate die-cuts and glue – the Xyron does it all for me!

What have you done with your Xyron today?
And if you don’t own one – then head on over to your local craft store or order it from www.chiswick.co.zawww.chiswick.co.za

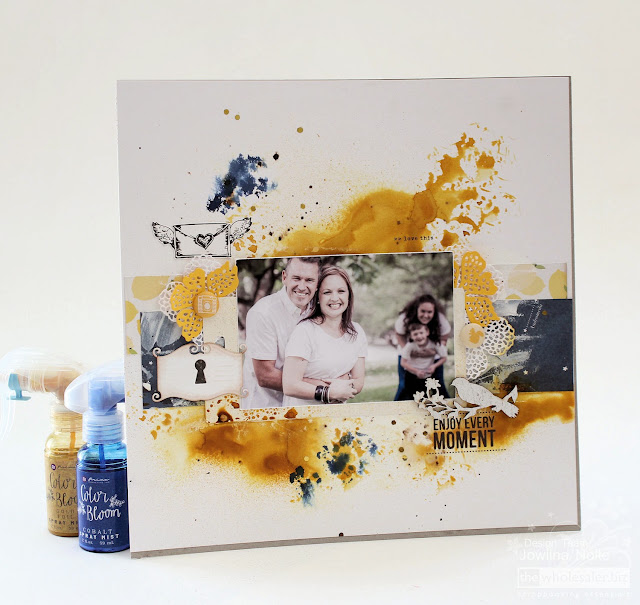
Details with cutting dies on a layout!

The more I use my collection of dies, the more I fall in love with them if that is even possible. I mean I really love the designs, but sometimes it is just an effort to pull out all the bits and pieces and actually use them – do you sometimes have that feeling? I know you do!
So in an effort to love my dies more and use them more, I have opted to keep my Cuttlebug machine on my desk permanently and that have made all the difference.
I started using my dies more and I love the simplicity they add to a layout, project life pocket and card – making such a huge impact. And the best part, you don’t need to do much to them to make them come into their own right.
For this layout I created a really busy background using inks and patterned papers. I wanted to add some soft flowers, but that didn’t work with the background so I opted for some die cuts to dress up my layout and finish it off.

step 1- I used the beautiful Prima flower die cuts and cut 3 large flowers out of smooth white AC cardstock. I left them white as is. To make the delicate cuts release easily from the die, I used Quick release paper between my die and cardstock.
step 2 - I then cut some yellow flowers using yellow smooth cardstock. I cut the yellow flowers in half since I was only tucking them under my packaging piece used for my photo matt.

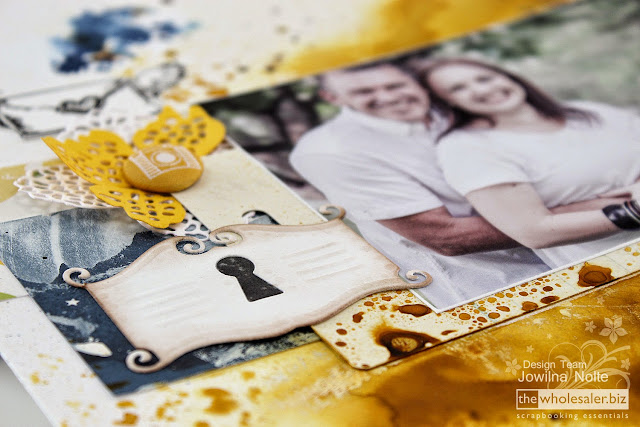
 step 3 - Cut the ‘locked’ die out of smooth white cardstock and ink the edges using brown chalk ink and a sponge dauber for a distressed look. TIP: to create an old world distressed and rusty look on my key hole die, I could have used a combination of embossing in silver and black dye inks, but I wanted it to be clean and fresh and uncomplicated.
 step 4 - Adhere two strips of patterned paper to your background cardstock. Add a layer of white gesso to the papers to make the ink adhere better to it. TIP: Gesso creates ‘tooth’ for ink and mist to adhere better to paper and cardstock as well as other surfaces like canvas, wood, metal, plastic.
step 5 - Position your photo matt, in this case my packaging piece and the die cut elements onto your prepared background to determine the correct placement. I tucked the flowers under the top left and right hand corner and then adhere them using two large brads. TIP: By leaving the die cuts loose on your layout, you create movement and dimension.
 step 6 - Add mists and colour to your background using Prima Colour Blooms.
 step 7 - Once all the inks are dry, adhere your photo in place. Adhere the ‘locked’ key hole die on the left overlapping your photo. I cut a second lock out of grey cardstock and adhere it in the keyhole. You can also just back the keyhole bit with patterned paper behind the opening to add colour and dimension.
 step 8 - Add a second colour to your background using a second colour of mist as an accent colour. Finish off with additional embellishments.
 PS: to minimize the buckling of my layout after adding all the inks, mists and mediums, I adhered it to a piece of grey chip using my Tombow glue stick making it really smooth and firm.
In a few easy steps I added some gorgeous details using cutting dies on a layout – simply cut out of cardstock – quick and easy.

Using Dies As Accents – Cluster Technique.

hello everyone - my apologies for still being MIA. But i still havea good reason - we are still not done with customizing my workspace. It has taken so much longer than what i hoped for various reasons! But I am seeing light at the end of the disorganized tunnel (and hopefully it's not a train).
So Fridays layout shared on the Wholesaler's blog is a fun one using some of my all time favourite dies from Couture Creations.
I have spoken a lot in the past about using dies on cards and layouts, and even as I use it more I realise the possibilities are endless. As you run out of elements to use and alphabets to create titles with, dies are those things that will never run out – each time you use a different paper or cardstock or technique on a die-cut, you can alter and change the way it looks and functions. 

TIP: when you group elements together on a layout, you form clusters. These make a bigger statement and have a huge impact when grouped closely together, when things are spread out too far from each other they lose their visual appeal and purpose.

Notice how the die cuts form an integrate part of the design without being lost – this is because they have a purpose in grounding the left hand side of the layout visually. The cluster also balances the layout having the enlarged photograph on the right hand side.
 
 I started off by adding my circle doily die cut underneath the vertical paper strips. I then added three leaf dies on top of the doily and finished off the cluster with a butterfly die cut on top of everything. A couple of printed tags cut from patterned paper and other elements finish off the cluster – but keeping everything nice and tidy close together.

Not only did I use the die-cuts to support my layout theme of being outside, the die cuts also lend colour and texture to the layout with its various layers.
And that’s how easy it is to incorporate die cuts into your layouts.

The Quick release paper on top of the die, creates a buffer between the die and your paper, which enables your paper to be released a lot easier as it is the release paper that will be left behind in the die. Trust me it makes a huge difference.
I place my dies skew inside my Cuttlebug – this way the pressure seems to be all over the die. This works especially when you have intricate dies with lots of details.

By colouring smooth white cardstock in different colours, I can create my own custom patterned papers in the exact colours I need for my project – making my die cuts unique and personalized each time I use them.
 Die cutting elements out of plain cardstock is so easy. They offer the opportunity to be inked on the edges, stamped on, embossed in your Cuttlebug, heat embossed, foiled, sanded, glittered or left plain. Each time you add a product to a die cut, you change the look of it, giving you loads of opportunities using them over and over again.

Tips and tricks for using die cuts:

When you cut detailed and intricate die designs on your Cuttlebug, I recommend that you use a metal cutting plate to ensure a nice clean cut

My sandwich in my machine for cutting is as follows: A, metal place, B, die facing up, paper, Quick release paper, C. I cut into my C plate – why? Well this was the original ever sandwich stack and it also prevents my B plate and C plate from curling up so much. I hardly ever replace my C or B plates because of curling and this is the reason why. When you use the stack A, C, B then your plates will curl excessively and will snap and need replacing more often.
**Please note that this is my own personal experience from practice
 

So go on – start using dies as accents, be brave try a cluster technique and start cutting away!


Popular Posts

Like us on Facebook

Flickr Images