My Valentine – make a decorative rosette with punches.

Are you planning something special for this Valentines Day and your loved ones? We try and celebrate love everyday so hardly ever do something special, but on the odd occasion i will do something that my better half really loves – like buy a slab of Lindt Chocolate and wrap it beautifully.
I started off by wrapping the chocolate slab in some pretty decorative paper, and then created a focal point topper using punches and dies.
A punched border runs down from top to bottom on the front, with a decorative rosette on top of the border.
 step 1 – Punch a border strip from patterned paper using your selected Tonic punch
 Step 2 – Keep the remainder of the paper left-over from the punched border, and trim that piece to measure 2.5cm wide.
 step 3 – Place the strip in a trimmer or score board and score the strip at every 5mm all along the length
 step 4 – Mountain and valley fold the entire strip on the score lines
 step 5 – adhere the two ends together after folding the strip. Keep it tight. The decorative scallop border now sits at the bottom and will form the outside of your rosette.
 step 6 – Adhere the rosette to a base circle using a hot glue gun from the Chiswick range.
 step 7 – Die cut some decorative elements from Chiswick cardstock.
 Assemble the rosette together with the die-cuts, punched border and sticker on the front of the decorated slab.
a Quick and easy way of adding a special touch to an ordinary slab of chocolate.
Textured cardstock Scarlet sb5270
Simplicity Strip Punch Daisy pct770
Chiswick Burnishing tool
What special gift will you create for your loved ones?
Remember to visit the website to view all these wonderful products www.chiswick.co.za
Until next time happy crafting!

American Crafts this to that accents and Project Life!

Have you started your Project Life album for 2015 yet? Well for a change I have, and I even started it on the first which is so comforting to get right back into memory keeping – you know recording the little things in life.
I was using the American Crafts range of “This to That” tape runners and fell in love all over again. Not only do they make things easier and quicker to adhere to your projects, but in my PL album it makes total sense. I can easily take them on the road, they are small and compact and super strong adhesives, but I can also create quick techniques and interesting effects using these roller tapes.
 For the background of this card I used a combination of Prima Color Bloom sprays and stencils to create a fun effect. A bicycle sticker and rub-ons complete the look.
 A few more stickers and some words cut from Kaisercraft papers.
Here's how I created my fun dot accents
Step 1 - Use the “dot” runner to draw a quick line across the bottom of your PL card
 Step 2 - Sprinkle the glue line liberally with AC glitter
Step 3 - Shake off the excess glitter and decorate the card with journaling and stickers and simply pop into your page protector
I love the different effects you can create with the dot and tab runners. So ask your local craft store for these wonderful products by name, and make sure you don’t get stuck on creativity!

The story layout - lovely layered photomatts.

Jowilna here, and Today I am sharing how i created a layered look with two different dies - nothing out of this world but the effect is so easy and so gorgeous - plus with all the new die releases up for 2015 - this look can be achieved using any of the new backgrounds and frames! I can't wait to experiment even more!
For my layout I combined the scallop rectangle nesting die and the beautiful Lotus Fillet | CO723240 
die to create an extended photo matt.
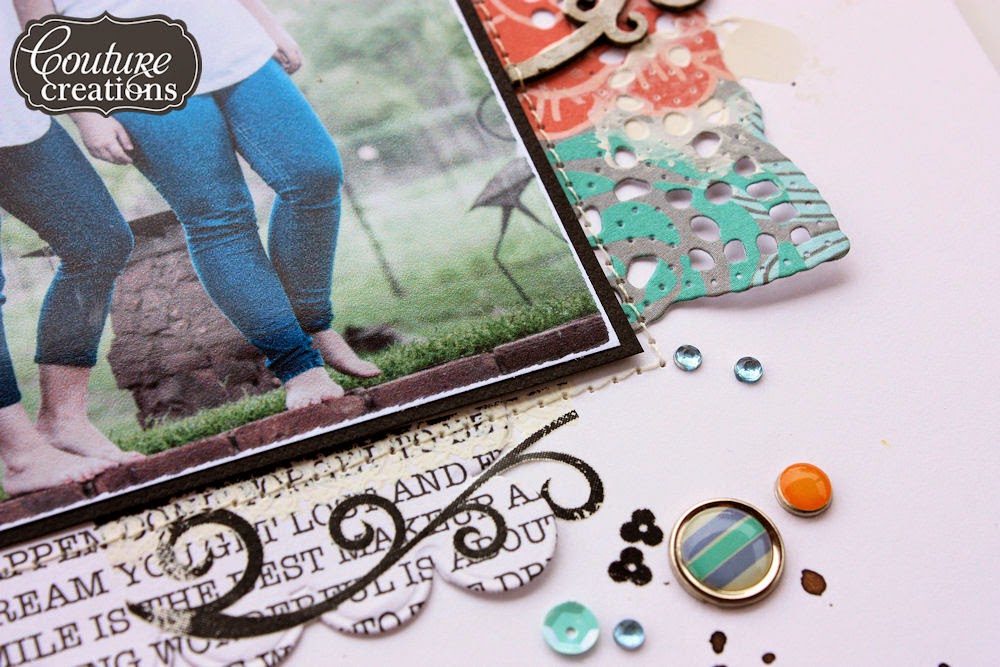
 I used scrap papers for all of the die-cuts. I first cut the large scallop and then cut the scallop piece into two horizontal halves. These pieces will form the top and bottom edges of my matt.
 Then use the Lotus Fillet | CO723240 die and cut the left and right hand side of your matt. My patterned paper piece was too small, so i simply positioned it onto the die on each side and cut them.
 Place the four sides overlapping onto each other and then position your matted photo onto the base - if you are happy with the look, adhere everything together to form an extended photo matt.
 I added the matted photo to my layout and then added some additional embellishments. I used this lovely chipboard frame from Imaginarium designs and cut it in half as well to compliment the look, and use it in two places on my layout.
 I added machine stitching all around the photo, and this also held the die-cut elements in place with the edges loose adding to the informal look.
 Repearting all the elements at the bottom of my layout with the beautiful chipboard element dressed up in some Prima heavy gesso and sewn to the layout.

I used this beautiful die from the Ornamental range Lotus Fillet | CO723240 die
Keep in mind that if you miss a die collection from Couture Creations you may not be able to get a hold of it again - so don't delay in getting the new designs as they are amazing! Visit your local craft store and make sure you ask for them by name. Also check out the website for new releases and the blog for some amazing inspiration.

Sparkle and WIN with this double page layout.

Sparkle! it's what Scrapbookers do! This week's layout tutorial and sxs article for Scrapbook Studio is live! You can download the sxs instructions for this layout and learn more on how I combined old and new products together, as well as learn a bit more about MementoLuxe ink pads. Just go here
You can also win an awesome prize - be inspired by my layout and use MementoLuxe ink on a layout and send it to Scrapbook studio to stand a chance to win!
You can only win if you follow the link and head over to the Scrapbook Studio website, then follow the steps as indicated!
We hope you will play along with us! Until next time - happy inking!

Double Page layout - Create magazine and Heidi Swapp.

Today I am sharing my double page layout based on the sketch from Create Magazine. I simply love Allison's sketches - she really is amazing. I love using sketches as a starting point, although more than often my layout turns out to be something a lot different. I use them to inspire me, to help me start a project and then I turn it into something very true to my style. And this assignment was no different.
I chopped and changed and moved things around.
For my accents and embellishments I used Multicoloured stamping with MementoLuxe ink pads, Christmas themed chipboards, stickers, washi tape, buttons, sewing and stenciling.
To get the sketches from the January issue, you can download them for free here

Thank you to Minette for letting me use her beautiful photos, and a special shout out to Annemarie for taking such amazing photos.
Here's wishing you a wonderful and creative day! Blessings!

in LOVE – Gesso textured cardstock effects on a card.

How are you enjoying the new year so far? Well can you believe we are almost done and dusted with January and skipping right ahead to Valentine’s day in February! So I hope you are ready for it… This week I had fun experimenting with Art mediums and cardstock, and the end result was a quick LOVE themed card.

I started off with a piece of red cardstock from the Chiswick range and covered the cardstock with a layer of thick white Gesso. The thick Gesso has an extra chalky feel to it and when it dried on the cardstock it gave it the most interesting effect.
About Gesso
Gesso is a white paint mixture consisting of a binder mixed with chalk, gypsum, pigment, or any combination of these. It is used in artwork as a preparation for any number of substrates such as wood panels, canvas and sculpture as a base for paint and other materials that are applied over it. It is basically a primer that will help paint and ink stick to different surfaces, but can also be used for interesting effects like i did here on cardstock, and even as an adhesive for layering flowers on canvas and other multimedia projects.
Here’s how I created my textured cardstock effects
step 1 – Apply some Gesso directly onto your cardstock using a palette knife. I spread out most of it into a thin layer but left some thicker patches for added texture and effect.
Step 2 – Leave the Gesso to dry completely – it takes a few minutes depending on how thick your application was and of course weather conditions also play a role.
You can see the beautiful effect the Gesso has on the texture cardstock once it was dry.
Step 3  – Cut your cardstock into 1cm wide strips, as well as a selection of patterned papers. Adhere the strips onto a scrap piece of cardstock about 6×6″ big filling the entire piece with paper strips. Make sure that the strips are flush against each other.
Step 4 – Use a die-cut, or a simple shape and cut a shape out of the strip panel with your paper strips running horizontally on your cut out. I used a die-cut that cuts two petals and then joined them together to form a heart shape.
To complete the heart, use double sided tape to adhere the two petals together at the back.
Machine stitch the center of the heart together using a zig-zag stitch or hand sew it together using embroidery thread like i did. Ink the outside edge of the heart shape using a dark brown chalk ink. Adhere to a folded card and add finishing touches like a bow and charm. Notice how the Gesso highlights the texture on the cardstock.
The Gesso still leaves the colour in tact but lightens it to a nice pink colour instead of red.
I added a light stenciling to the background of my card using ink and a sponge dauber. A nice clean look that showcases the heart shape beautifully.

Should you have any queries or are in search of any products from the Chiswick range, visit our website
Products used
Textured Cardstock 216g 12×22″ Scarlet
Kaisercraft XO Collection Patterned Paper

Until next time…keep on creating!

Create Magazine Card project.

 Today I am sharing the card I created with the wonderful sketch from the January issue 
 I love creating this card - initially i tried something a little different, just to come back to the beginning and realize it is so not me! The moral of the story - stick to what you know.
I ended up using a whole bunch of this created in a class and never used - I also now myself so well - classes are not for me LOL.
But in the end i love how it turned out.
 I used my normal white base cardstock, then added some scrap paper strips from Prima - these were all scraps from my scrap box under my table. Those beautiful pieces I can never part with.
The embossed detail was done on printed tissue paper adhered to a cardboard base. The base was created by adhering the tissue with gel medium and leaving it to dry. Then add the white embossed stamped image and then add colour using whatever ink or medium you prefer. Crakle stamping finishes off the look.
The arrow is a Sizzix die and coloured using different inks. I layered the arrow on top of the paper strips, followed by a cut out star and webster's phrase sticker, button and enamel dot. And of course there had to be hand sewn details on my card - life is so incomplete without sewing - lots of texture and detail!
This was a quick and easy card - and having a sketch to follow made things so much easier!
It just goes to show once again, that having some guidelines, lots of inspiration and a whole bunch of scraps really doe spay off!

the january issue of Create is live!

The January issue of Scrapbook Generation's CREATE is live!
I am so honored to be a part of this amazing team. Ever since i can remember I have searched high and low for someone that "gets" my sewing on layouts - and here in this team of Debbie and Allison -  I have found my self!
Enjoy all 303 pages of this free digital publication.It's amazing - filled with loads of inspiration and gorgeous projects to inspire you!
It's jam-packed with inspiration by the CREATE team, the Jillibean Soup team, and our readers.
Until next time - enjoy the inspiration!

AC cardstock handmade card in 10 minutes!

American Crafts cardstock has grown to be one of my favourite cardstock brands. The quality and colours is what I find most appealing – and the fact that you can use it for anything is a real bonus – cardstock after all is the staple food for any serious crafter! And this is my brand choice.
So during the holidays I did some catching up on my empty card box, and tried to make some quick and easy cards to fill it so that I would be set for the coming year when I needed a quick card – and AC cardstock was perfect – bright beautiful colours and loads of texture.

Here’s how I created this 10 minute card:

  • Step 1 Die cut a project life style card using your silhouette or Cuttlebug machine – whatever you have. I used a purple colour for this part from my American Crafts cardstock pack. For my Silhouette cut, I set my machine to cut “textured cardstock” for a nice clean cut – I did need to change my blade that was well worn by now, but I loved some of the raggedy edges so just worked with the look.

  • Step 2 Use two additional colours of cardstock from your pack and cut several strips of different widths using the two colours. Don’t think just cut! Adhere the strips flush to each other on a scrap piece of white cardstock. Make sure the cardstock strips are wide enough to cover the inside of your due cut card.

  • Step 3 Adhere the die-cut card to the multi-coloured strip base so that the striped for the inside backing of the cut out. Then use your scissors and trim off the edges for a nice neat finish. Adhere the card to the front of a smooth white folded base card of American Crafts smooth cardstock and finish off with some brads and twine.

And there you have a ten minute AC cardstock handmade card ready to be used in the coming year. Card making is the perfect destresser during the holidays – so rad the kids and get creative with your cardstock!

Popular Posts

Like us on Facebook

Flickr Images