JBay Scrapbooking Event | Book your seat today!

Spend a day (or three…) with me......
Jowilna has been in the Scrapbooking Industry for many years and she has contributed to the South African market in ways that are too many to name here…  She currently serves as Design Team member for South Africa’s major Scrapbook Product Distributor, The Wholesaler, as well as Lady Pattern Paper, Chiswick and International Brand Imagine Crafts. She contributes to Scrapbook Generation’s International publication and she has published several books on Paper Crafting, Card Making and Scrapbooking.
We are honoured and privileged to welcome her to Scrapbook Studio!
WHEN?
Thursday 29 September 2016 Group 1
Or
Friday 30 September 2016 Group 2
Or
Saturday 1 October 2016 Group 3
WHERE?
Scrapbook Studio JBay, 106 Da Gama Road, Jeffreys Bay
HOW MUCH?
R895-00 per Day
Price includes full day classes with Jowilna, refreshments, lunch as well as a bumper packed goodie bag!
Only 20 seats available per day.  All classes will be different.

Click on the link to book your spot today! Exciting NEW Classes and Exciting NEW product specially imported for these classes!
http://shop.scrapbookstudio.co.za/index.php/events/jowilna-2016

Secret Scrapbook Event | Couture Creations & The Wholesaler

It's been a while - well 3 weeks since I blogged. With good reason. I have been off teaching at the Secret Scrapbook Event sponsored by Couture Creations & The Wholesaler and presented by Scrapbook Studio. Thank you for giving me the opportunity to share my life and passion with the delegates - sharing my God given talents with them. I am blessed by what I do and hyave done for past 20 years! What an amazing event it was, taking us from Cape Town to Pretoria, to Johannesburg, Bloemfontein and then down to JBay for the final leg.

We laughed, I cried, we ate like piggies, we scrapped, we coloured, we cut and we made memories.
We had a great time but I am happy to be home, catching up on mails and work and getting creative again. So for now I leave you with this amazing image taken in Cape Town and then the one below on the last leg of our journey in JBay.
Thank you for hanging around while I was away! I will be back with loads of exciting news happening around here! Until later ....

hello October blogging.

I can hardly believe it's October - the months and this year is just racing by! I am so behind blogging for the last part of September due to some technical difficulties but hopefully am back for good and regularly! Thanks for hanging out though - without blog readers and followers there really is no point to blogging! So please know that you are appreciated and loved!
For today I am sharing a few things and you can head on over to the blogs to read the full articles, and remember to leave some love there - thank you!
We are beginning to think about Christmas - gasp - I know - can we just catch up to this year and slow down for a second. But hey its true. so head on over to Lady Pattern Paper blog and see how I Created these cute little folded gift bag/boxes. So simple and yet so effective.
And over on The Wholesaler blog you can read all about my wonderful and sometimes frustrating experience with the NEW Silhouette CURIO machine and work space.
I am truly blessed to have been given this machine by our wonderful distributor The Wholesaler and Silhouette America. This is an amazing machine and if you are consider buying one - this-is-it!
 Well that's it for today! I will be back tomorrow with some more posts - full posts this time!
In the meantime have an amazingly creative day...and don't forget to book for this upcoming amazing event - you don't want to miss out!
http://bit.ly/Secret-Scrapbooking-Event”

Have you booked?

It's been a while since I have blogged - i took a few personal days and look its all still here! thanks for hanging around though! In the meantime I did a lot of catching up on random things. But.... just wanted to hop in today and say
HAVE YOU BOOKED?

“Have you booked your seat for this Event? So excited to be part of this Scrapbook Studio Event – Couture Creations is a great International Scrapbook Company whose products are distributed by The Wholesaler in South Africa!
Book TODAY by just clicking on this link
http://bit.ly/Secret-Scrapbooking-Event”

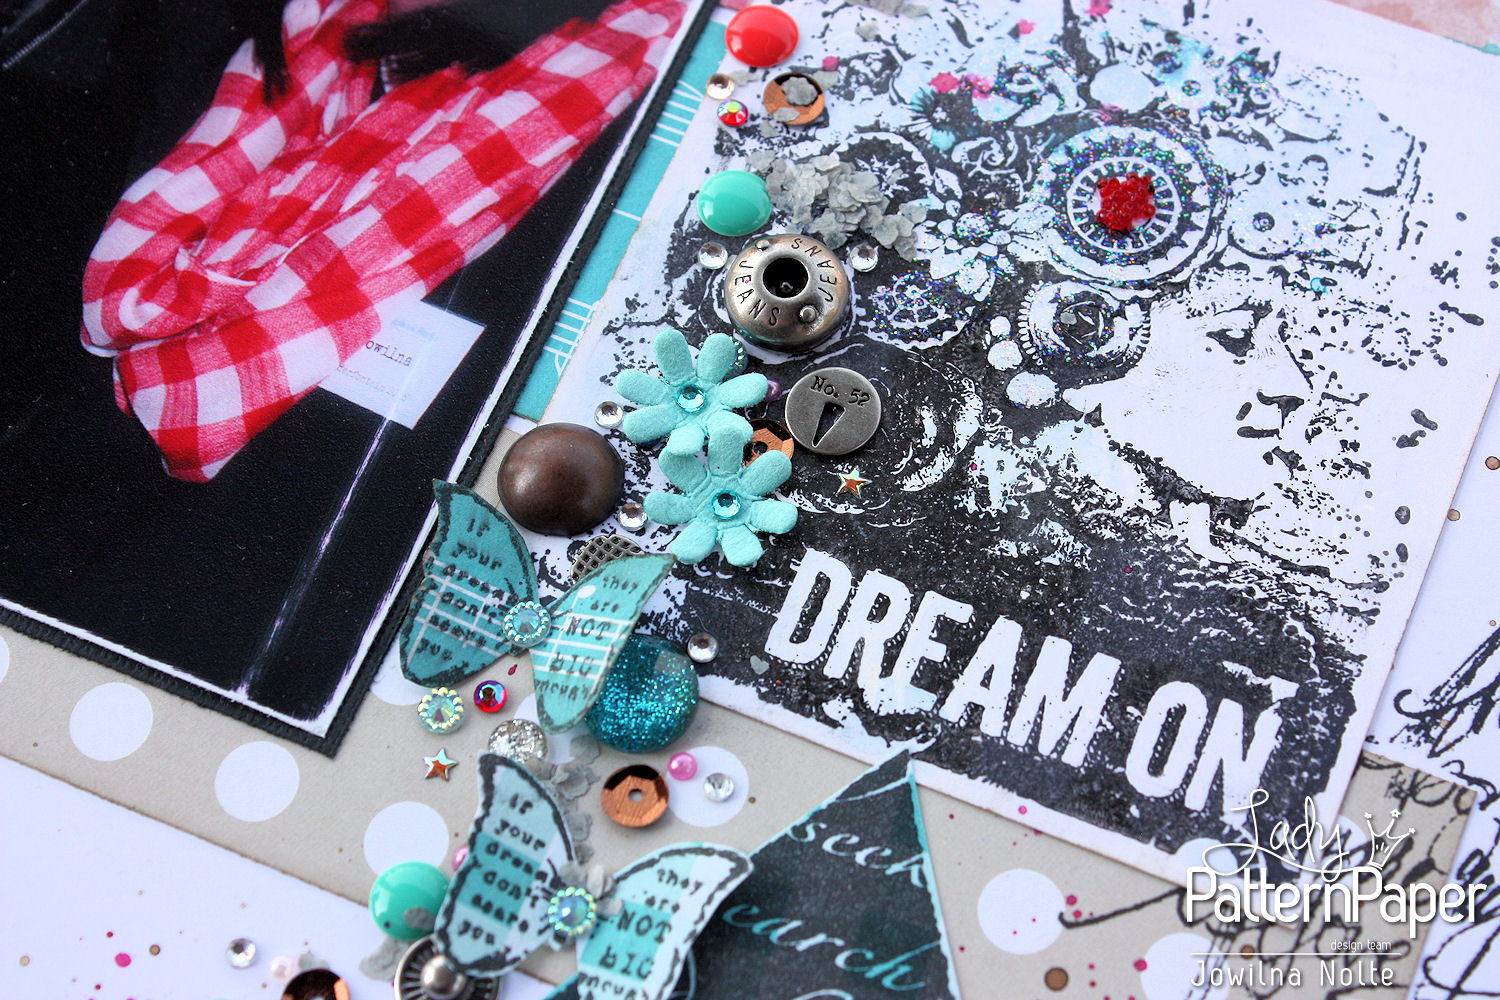
Stamped details with lady Pattern Paper.

I have a huge selection of gorgeous stamps that I love so much. So I am on a mission to use all of them at least once this year – quite a commitment and mission but something that is making me feel so much better. But more exciting is the fact that I can create my own embellishments using my stamps. So I stamped a couple of images onto my Lady Pattern Paper and used them on my layout turning my layout into something truly unique.


I used a combination of the Intense Teal and So Buff papers to create a very pleasant layout that is calm – a somewhat neutral background for my photos to sit on and the cluster of stamped elements and embellishments.

 I stamped this beautiful diamond shaped stamp onto the Essentials Gingham pattern. The stamp allows a slight hint of colour and pattern to show through it making for an interesting element.


 I only use VersaFine ink for most of my stamped images. This ink is perfect for the detailed stamps I used, and dries perfectly on the Lady Pattern Paper.
 For my butterfly stamped images I used a combination of Gingham and Sheet Music papers in Teal. The pure black ink against the stunning teal colour is such a wonderful combination. To finish off the stamped butterflies I added some metal elements and diamanté to the centres as a nice finishing touch adding dimension.
 Use large and small butterfly images and stamp them onto your patterned paper to create your own embellishments. Dress them up with other elements and let them float on your layout by only adhering them in the centre of the butterfly and letting the wings float lose.
To add some of my red/pink accent colour I used a scrap of the Pink Mary script paper to the right hand side of my layout, combined it with stamped words and elements for dimension and texture. Grouping elements together to fill an empty space on a layout makes for a wonderful and simple statement.

I love how busy this layout is, but also quite pleasing with loads of interest. And my favourite foundation for creating this stamped detail layout is my Lady Pattern Papers.


Stamping with stencils - Prima layout.

Over on the Scrapbook Studio blog I share how i used my much loved stencils as stamps to create backgrounds on my layouts. Stencils are one of those underused things in our stash that is really worth so much.Head on  over here
and see how you can win a product hamper by simply using your stash.
Versatile and pretty at the same time - combine your stencils with dye inks and create fabulous background effects.
 Combining Prima resin frames with old postage stamps -  a perfect combination between old and new.
 All Prima products are distributed by The Wholesaler in South Africa and available from
www.scrapbookstudio.co.za
Until next time - have a wonderfully creative week!

Hello.. make your own shiny paper and accents double page layout.

Whenever I create a layout or other project, I always try and find a way to use what I have and not to purchase things I may only use every now and again. And so it came to be that I needed a little piece of glossy cardstock, not something I use often, so I made my own for some stamped decorative elements and die-cuts.

I used the new All-Purpose inks from Tsukineko distributed by The Wholesaler in South Africa to create my sparkly papers. On the piece below I added some stamping...

and for the rest I used some new die-cuts by Ultimate Crafts to create this stunning effect. I think this may be by new most favourite die ever!

For the full tutorial on this layout, head on over to the Scrapbook Studio website and download it. Included in the download is a sxs on how to create your layout, as well as the sxs on the techniques used to create my shimmering elements and background pieces.
Bringing you new and innovative ways of working with these amazing inks available from Scrapbook Studio - your one stop shop.

Sparkle and WIN with this double page layout.

Sparkle! it's what Scrapbookers do! This week's layout tutorial and sxs article for Scrapbook Studio is live! You can download the sxs instructions for this layout and learn more on how I combined old and new products together, as well as learn a bit more about MementoLuxe ink pads. Just go here
You can also win an awesome prize - be inspired by my layout and use MementoLuxe ink on a layout and send it to Scrapbook studio to stand a chance to win!
You can only win if you follow the link and head over to the Scrapbook Studio website, then follow the steps as indicated!
We hope you will play along with us! Until next time - happy inking!

MomentoLuxe inks - multicoloured stamping.

The launch of the new MementoLUXE ink pads in South Africa has brought much excitement! I for one am really excited about this quality ink that is perfect for stamping and mixed media. The ink is made for any surface imaginable and those who love working on canvas and other surfaces will simply love it. Today I am sharing an easy way of achieving multicolored images using this amazing ink - easy and effective!
To achieve this beautiful multicoloured effect using your stamps is really so easy
 The possibilities are endless...
 For the full step x step tutorial, you can download the technique sheet and instructions to complete the layout here
All the wonderful products used are available from Scrapbook Studio.
MementoLuxe Inks are distributed in South Africa by The Wholesaler.
Products used
MementoLuxe Love Letter
MementoLuxe Morocco
Sponge daubers
Stamp - Kaisercraft
Patterned paper: Kaisercraft, Tim Holtz,
Other: Silhouette, buttons, sequins, thread
Until next time - wishing you a week filled with creativity and peace.

Superhero stuff double page layout

Inspired by this new “off the wall” range of papers from Kaisercraft I created this fun layout. It helped that I could use the most perfect photos from a friend to complete the work of art. The stamps available in the range helped me to create decorative elements perfect for this layout.

Production Text Photography by Jowilna Nolte © Photos supplied by Minette Botha taken by Artery Photography & Design


About this layout
How to create the curved left edge of your layout
If you have a template trace it onto your patterned blue paper with the splats on. Then adhere it to orange cardstock and cut a 5mm border so that the orange peeks out from underneath.
Trace a second shape onto a darker patterned paper and trim it smaller – adhere this piece on top of the first traced shape 7cm from the left edge – add machine or hand sewing to finish it off.
**I used a large circle to create my shaped border, if you don’t have a large circle here’s how you create it – cut a 13cm wide strip of patterned paper. Make a mark in the middle 9cm in from the left edge and 15cm down from the top – now draw a curved line from the top right edge towards the middle 9cm mark and then out towards the bottom right hand
corner – cut and ink the edges.

2. Once you have created your left curved edge, adhere it flush to the left edge of your layout.
3. Matt your photos. I matted the four photos on the left hand side all on one piece of cardstock and trimmed around the
edge. Adhere the photos 5.3cm from the bottom edge and flush in the middle.
4. Adhere the remainder of your photos on the right hand side of your layout with a 2mm spacing from the left edge.
5. Cut a piece of the graffiti paper 14cm wide and ink the edges. Adhere this strip next to the photos on the right hand side with a small spacing between the paper and the matted photos.
6. Cut a 2cm wide strip from the graph paper, ink the edges and adhere it flush with the graffiti paper strip on the right side of it.
7. Trim a 5mm wide strip of orange cardstock and adhere it to the right
8. Trim a barcode strip off of your patterned paper and adhere it next to the orange cardstock strip.
9. Adhere a Project Life card on the right side of your layout 7cm from the bottom edge and on the graffiti paper panel.
10. Add your sewing. I added a creative border sewing on the graph paper strip by using the squares as a guide to pierce holes. See how I sew my arrow shape on the following page.
11. Cut two flags from paper scraps measuring about 5cmx2cm, ink the edges and adhere them 7cm from the bottom
edge on the left page.
12. Stamp five circles on acetate using a foam circle stamp and Silver StazOn ink pad. Leave the circles to dry thoroughly
and then cut them out using your scissors. Warning: Do not try punching them - some punched will jam and break
permanently if you try to punch acetate.
13. Position the circles on your layout and make a hole using your paper piercer. Adhere the circle onto the page using
brads instead of an adhesive that will show through. Trim off the overlapping parts of the circles on the edges.
14. Stamp orange stars onto scrap paper as well as the word awesome. Trim the stars and adhere them using foam tape. Fold the awesome stamped ticket over and adhere with a brad and adhesive. Add your title and any other boy embellishments you want to. Add additional machine sewing and diamanté to finish it off. Remember your journaling!

I used hand sewing on my layout because I love the texture and dimension it adds. But I also love machine stitching and have no problem combining the two together on a single layout. Here I used a
variegated green silk thread to sew with my machine - it runs from white to light green to dark green and adds so much interest. I also did some sewing through my title stickers to make sure they are permanent - this works really well when stickers aren’t that sticky anymore.

Project Life cards from the kits ranges are perfect to use on your layouts. These cards offers you a place to add journaling, extra photos like a decorative photo matt and acts as a powerful and instant decorative element on your layout. I use themed project life cards on my layouts all the time - the thinking has been done already and often they only need a small amount of dressing up to act as a really cool element. And when I am done I can also use them in my PL albums for everyday memories.
This article was written and created for Scrapbook Studio - the full PDF can be downloaded with the layout sketch from their website. www.scrapbookstudio.co.za

Dainfern Scrapbook Event 2014.

Due to popular demand we are back at it again
Dainfern Scrapbook Event 2014
Book now for a two day Scrapbook Event at Dainfern Clubhouse,
Dainfern, Gauteng for only R1750 with
Jowilna Nolte (from Scrapcouture) and Cariena Basson (from Scrapbook Studio JBay) 
Saturday 26 July and Sunday 27 July 2014

Schedule:
Saturday 26 July 2014
8am-8:30am Arrival & Registration
8:30am – 10:30am Session 1
10:30am-11am Tea Break
11am – 12:30pm Session 1 Continues
12:30pm-1:30pm Lunch 
1:30pm-3:30pm Session 2
3:30pm-4pm Tea Break
4pm-5:30pm Session 2 Continues
Sunday 27 July 2014
8am-8:30am – Arrival & Tea
8:30am-10:30am Session 3
10:30am-11am Tea Break
11am-12:30pm Session 3 Continues
12:30pm-13:30pm Lunch
13:30pm-15:30pm Session 4
15:30pm-16:00pm Tea Break
16:00pm-5:30pm Session 4 Continues
Deposit of R500 secures your seat followed by 5 payments of R250 - final payment 30 June 2014!

Join us for a day filled with Amazing New Techniques, Lucky draws, goodie bags!
There will also be lots of Retail Therapy!! For any further queries, please email events@scrapbookstudio.co.za

Scrap Africa snowflake challenge.

there's a new challenge up over at Scrap Africa - which i am co-hosting and challenging you on this month...I love themed challenges as inspiration and a starting point for creativity, having said that i hate following rules too but i usually use them to trigger an idea, colour scheme or theme. so if you are in need of getting a creative jump start this festive season then join us and come and play along...
the challenge was snowflakes, stencilling and glitter, and here's what i did with my tag.
the background was coloured using Mister Huey inks and Distress inks. Once dry i used a circle stencil and stenciled two different colours of ink over each other. i also inked the edges a bit darker to add definition.
i used the same colours of ink to colour my seam binding ribbon - you can get yours from www.scrapbookstudio.co.za - they have loads of colours ins stock and their service is really great.
the snowflake is from Celebr8 and distributed by The Wholesaler. i love these snowflake layered chippies - they are so detailed and delicate. i misted the top layer with Mister Huey and then once dry added a layer of Star Dust Glitter glue.
to finish off my tag i added some stamping and diamante for texture and dimension and added pattern. this would make a great gift tag for a pressie....
head on over to the blog and see what the rest of the amazing team came up with - truly different and unique. and for a chance to win some goodies....play along with us! we would love to see what you do with your snowflakes.

passionate about project life.

My passion for Project Life continues as i start to share more of it across the country bit by bit. At the end of October Scrapbook Studio had their Pine Lodge event and i got to teach 6 hours of Project Life. it would have been a grueling task but the ladies were so excited and took to it like ducks to water which made it a really wonderful experience. it was either going to be a hit or a miss and it was a BIG hit with the delegates. i loved how they carefully selected their little cards (which took the longest of time by far) and then carefully placed them in the pockets after dressing them up with loads of techniques. i am so thankful for the opportunity through various people but most of all to The Wholesaler for listening and taking advice to bring in this wonderful concept to South Africa.
i am by no means caught up with my album - but that's the great thing - it's OK. because in the end i have loads of half empty pockets with sticky notes of what happened where and when and i can take my time and journal and add them at my leisure! i can be as creative as i want to be...or do a simplistic layout - whatever gets me going that week. Hope you Project Lifers are still hanging in there. wishing you all a real life experience this week - filled with creativity off course!

sketch 338 at scrapbook challenges.

well Monday has come and gone and it's time for another sketch over at scrapbook challenges. I designed this week's sketch and the lovely Chanell did a super job turning it into digital. Pure genius! so we hope you will play along with us this week - you will find loads of inspiration from the others girls by heading to the blog! we have both a single and double page version so you can scrap whatever makes you happy....and for me it's a double - double the fun!


and here's what i did with the sketch....
i used some pics from our Scrapbook Studio retreat in Feb. and my title 'stay a while' reflects a bit about that magical place! my title by the way was done with "letraset" rub-ons from about 20 years ago, maybe even more and they still worked. I used a diamond stencil on my background from crafters workshop - love those!
i used a giant 'thread spool' label on chipboard combined with pretty Prima and Petaloo flowers, kaisercraft rub-ons and Crate chipboard....
some pretty washi tape peeking out from under all the layers, combined with another kaisercraft stamp favourite
and another crate chipboard sticker element. i hope you are having a creative week filled with lots of goodness. we have had some amazing rain and that is always a good thing - i love that sort of weather with lots of coolness, mist on the mountain and soft rain on a thatch roof - bliss for being creative. thanks for popping in and sticking around - without blog readers and comments, having a blog is pretty useless(mostly). you are a blessing!

Popular Posts

Like us on Facebook

Flickr Images