Make A Mark With Silhouette Stamp Material.

You guys know how much I love stamps and using them on my projects, and that I have a slight stamp addiction, so having said that, a girl can never have too many stamps and there is always that need for the next project! 
 So I was thrilled to finally try my hand at cutting my won stamps on the Silhouette – and it worked like a dream. The stamps are not bad at all – they will never last a lifetime like the proper manufactured stamps we buy made from red rubber or acrylic but they work beautifully. The only thing that sets them apart is that the stamp material is not that thick, although it is very strong. This is only a problem when you start inking the stamp, but even then, when done the right way is not really an issue at all.

step 1 - You will need some stamp material, your special stamp cutting matt and your Silhouette machine.
 step 2 - Remove the white protective sheet from the cutting matt. You will notice the cutting matt is full of small holes. This is so that the stamp material [rubber sheet] can breathe – when you adhere the stamp material to the cutting matt you need to press it down to remove all the air bubbles from the sheet and the holes in the cutting matt helps with this process. If there is any air bubbles while cutting the stamp material may scrunch up and cause a misformed shape being cut.

step 3 - Adhere the stamp material to the cutting matt and make sure you remove all the air bubbles
 step 4 - Set your cutting blade to the #9 setting for cutting the stamp material.
 step 5 - Change the rollers on the machine so that they will fit onto the stamp cutting matt. Then load the cutting matt into the machine.
 step 6 - Open your Silhouette software. Open the design page settings and select “stamp” mat from the cutting matt box.
 step 7 - Change the paper to fit onto the cutting mat – which is also the size of the full sheet of stamp material 7.5×6”. TIP: I chose to use the entire sheet of stamp material rather then cut it to size to just cut one stamp. I filled the entire sheet with a range of stamps and cut them all at once – the left-overs I will use in another way.
 step 8 - Pick the design you want to cut for your first stamp. I used this gorgeous flower silhouette, but knew that the detail may be too much for the thin stamp material, so I edited it a bit. TIP: remember when cutting stamps, you rather want a bold solid design than a thin detailed image.
 step 9 - Pick your eraser tool from the menu on the left.
 step 10 - Erase the parts that you do not want to cut from the original design. I then copied the image so that I would cut two stamps of the same flower.
 step 11 - I also added some more designs to my stamp material that I wanted to cut.
 step 12 - Send the file to the machine and cut. Remove the cutting matt from the machine and carefully peel off the stamp sheet. You will notice that some areas you need to full at the stamp a bit release the design – be careful but not overly careful. The stamp material is quite strong and will tear with just the right amount of pressure.
 step 13 - Remove the stamp and adhere them to an acrylic block. You are now ready to stamp your images.
 step 14 - Because your stamp material is brand new, you will notice that it seems that the ink does not take to the stamp, this will correct itself by adding ink and stamping for a couple of times before you get perfect image. Using the right type of ink for this is essential.
step 15 - Stamp the image and sprinkle with embossing powder. Heat set until the powder turns shiny with a heat gun.
 I recommend using Versafine ink pads for basic stamping, Versamark for embossing your images and Versamagic for colourful stamped images. I tried all of these inks and they work perfectly on the Silhouette Stamp Material.
 Products Used

American Crafts this to that accents and Project Life!

Have you started your Project Life album for 2015 yet? Well for a change I have, and I even started it on the first which is so comforting to get right back into memory keeping – you know recording the little things in life.
I was using the American Crafts range of “This to That” tape runners and fell in love all over again. Not only do they make things easier and quicker to adhere to your projects, but in my PL album it makes total sense. I can easily take them on the road, they are small and compact and super strong adhesives, but I can also create quick techniques and interesting effects using these roller tapes.
 For the background of this card I used a combination of Prima Color Bloom sprays and stencils to create a fun effect. A bicycle sticker and rub-ons complete the look.
 A few more stickers and some words cut from Kaisercraft papers.
Here's how I created my fun dot accents
Step 1 - Use the “dot” runner to draw a quick line across the bottom of your PL card
 Step 2 - Sprinkle the glue line liberally with AC glitter
Step 3 - Shake off the excess glitter and decorate the card with journaling and stickers and simply pop into your page protector
I love the different effects you can create with the dot and tab runners. So ask your local craft store for these wonderful products by name, and make sure you don’t get stuck on creativity!

AC cardstock handmade card in 10 minutes!

American Crafts cardstock has grown to be one of my favourite cardstock brands. The quality and colours is what I find most appealing – and the fact that you can use it for anything is a real bonus – cardstock after all is the staple food for any serious crafter! And this is my brand choice.
So during the holidays I did some catching up on my empty card box, and tried to make some quick and easy cards to fill it so that I would be set for the coming year when I needed a quick card – and AC cardstock was perfect – bright beautiful colours and loads of texture.

Here’s how I created this 10 minute card:

  • Step 1 Die cut a project life style card using your silhouette or Cuttlebug machine – whatever you have. I used a purple colour for this part from my American Crafts cardstock pack. For my Silhouette cut, I set my machine to cut “textured cardstock” for a nice clean cut – I did need to change my blade that was well worn by now, but I loved some of the raggedy edges so just worked with the look.

  • Step 2 Use two additional colours of cardstock from your pack and cut several strips of different widths using the two colours. Don’t think just cut! Adhere the strips flush to each other on a scrap piece of white cardstock. Make sure the cardstock strips are wide enough to cover the inside of your due cut card.

  • Step 3 Adhere the die-cut card to the multi-coloured strip base so that the striped for the inside backing of the cut out. Then use your scissors and trim off the edges for a nice neat finish. Adhere the card to the front of a smooth white folded base card of American Crafts smooth cardstock and finish off with some brads and twine.

And there you have a ten minute AC cardstock handmade card ready to be used in the coming year. Card making is the perfect destresser during the holidays – so rad the kids and get creative with your cardstock!

Free Silhouette Paint Splat images to cut for your layouts and projects.

It’s been a while since technology has made me really excited. In a world where computers and instant gratification has taken over one can so easily get lost in it all. But then every once in a while something magical comes around – like die-cutting machines and in specific The Silhouette CAMEO®.
Now bear in mind there are loads of brands available on the market but for now – this is the one that makes my skip a beat or two.
I am very sceptical when it comes to gadgets – simply because I know how quickly they can lose their magic in terms of everyday use. But I think this one may be a keeper… So while the iron is hot – I suggest you strike NOW! The appeal for me was the fact that I could draw or create my own images and cut them – something unique and different to everyone else. So here’s what I came up with.
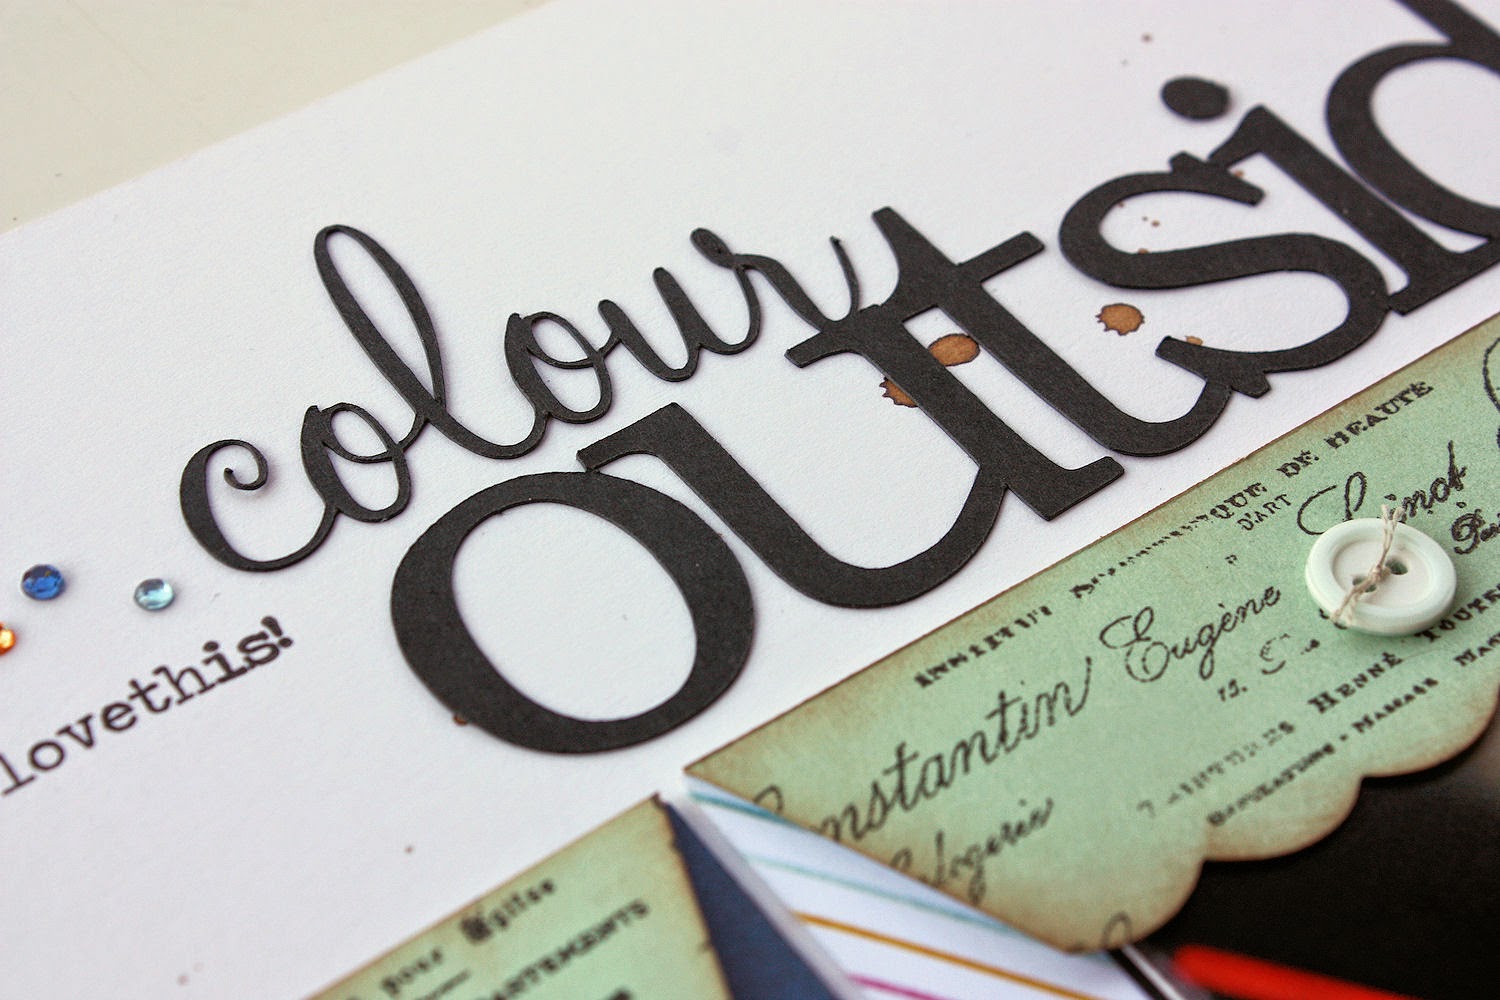
 Colour outside the lines layout
I wanted to create fun paint splatters that I could cut with the Silhouette in different colours and sizes and now was the perfect opportunity. As a bonus we are offering you the paint splats as a free download image (right click on the splatter links and click “Save link as” or “Save target as” splatter 1 and splatter 2), and an easy introductory explanation of how I created my paint splats into images that can be cut to use on my layout.
What you need to know, is that an image can be cut with the Silhouette – but you need to first import them into your Library, from which you can then add them to the page, trace the image outline and then cut the images – in laymans terms and a quick explanation of what I did. So here goes…
 

Open the Silhouette Studio Software. Click onto the File tab in the top left hand corner and select Import, Import to Library – You can create different Libraries of where you keep your images i.e images that comes preloaded on the machine, your own designs, downloaded images, and then you can also categorize them into themes like animals, school, love etc. *At this time, I will also load the material into the machine. Make sure the Silhouette is turned on, press the enter button to load the cutting matt
Select the image you want to import into your Library to cut. This can be a PNG, JPG, TIF, BMP, and GIF image. Click OK and the images will load into your Library.
Now that the images is in your Library, double click the image to open it onto your page that represents the cutting matt and material that will be cut in the Silhouette
I added both the paint splat images onto my page at the same time. You can now size the images to the size you want to cut them. Remember to hold the Shift key in while resizing to resize the image proportionally.
 The next step is to trace the outline of the images so that the Silhouette can recognize the cut lines. Click on the object and then on Trace
 You need to select the trace area by drawing a block (selection) around the images
On the right hand side, select trace outlines. The images will get a red line around them. You can now click on the black images and delete them leaving the read outlines only
Click on the send to Silhouette icon(highlighted blue below). The red lines of the images will go slightly thicker. Click start on the right hand side to start the cutting process.
Remember to save your images – click File, then save to library so that you can use it in future again and again.
For my paint splats I used American Crafts Smooth cardstock.
This is a quick and easy Silhouette Studio tutorial visual on how to get started. Watch out for more tips and tricks on cutting and using your new Silhouette CAMEO® machine – it will truly change your life!
Click here to see all the Silhouette electronic cutting tools currently available in South Africa!
Happy Cutting!

Dressed Up Border Punch Card.

It really is all in the details when it comes to creating with paper and punches. Punches are amazing tools that can help you add the necessary details to any projects in the smallest and simplest of ways. They can stand along wonderfully and together with other elements they shine just as bright. So how do I dress up my plain border punches to add interest to a project?
For this card I have found my new favourite border punch (sounds familiar right) – well I really have. The humble border punch filled with lots of little circles. Perfect in every way!
For my patterned paper I used the Kaisercraft Bow & Arrow range of papers that worked perfectly with my design.
Step 1 - I used the punch to punch a border from salmon pink cardstock and a brown patterned paper.
Step 2 - I then aligned the punched strips off-set from each other so that the pink would show through the back of the brown strip layered on top and adhere it to the background of my card.
Step 3 - I made small pierced holes using my Couture Creations paper piercer and sewed small pink seed beads to the inside of the punched circles using the pilot holes I made. I also added some thin gold straight stitches to the card from one hole to another connecting the punched circles to each other.
Although not that visible on the card – I truly adds the most beautiful texture and dimension in a subtle way to my punched border. It just goes to show, that the simplest of details really can made a difference to those everyday punched borders – making your basic tools more functional.
Products used

Popular Posts

Like us on Facebook

Flickr Images