hello everyone - my apologies for still being MIA. But i still havea good reason - we are still not done with customizing my workspace. It has taken so much longer than what i hoped for various reasons! But I am seeing light at the end of the disorganized tunnel (and hopefully it's not a train).
So Fridays layout shared on the Wholesaler's blog is a fun one using some of my all time favourite dies from Couture Creations.
So Fridays layout shared on the Wholesaler's blog is a fun one using some of my all time favourite dies from Couture Creations.
I have spoken a lot in the past about using dies on cards and layouts,
and even as I use it more I realise the possibilities are endless. As
you run out of elements to use and alphabets to create titles with, dies
are those things that will never run out – each time you use a
different paper or cardstock or technique on a die-cut, you can alter
and change the way it looks and functions.
TIP: when you group elements together on a layout, you form clusters. These make a bigger statement and have a huge impact when grouped closely together, when things are spread out too far from each other they lose their visual appeal and purpose.
Notice how the die cuts form an integrate part of the design without
being lost – this is because they have a purpose in grounding the left
hand side of the layout visually. The cluster also balances the layout
having the enlarged photograph on the right hand side.
I started off by adding my circle doily die cut
underneath the vertical paper strips. I then added three leaf dies on
top of the doily and finished off the cluster with a butterfly die cut
on top of everything. A couple of printed tags cut from patterned paper
and other elements finish off the cluster – but keeping everything nice
and tidy close together.
Not only did I use the die-cuts to support my layout theme of being
outside, the die cuts also lend colour and texture to the layout with
its various layers.
And that’s how easy it is to incorporate die cuts into your layouts.
The Quick release paper on top of the die, creates a buffer between
the die and your paper, which enables your paper to be released a lot
easier as it is the release paper that will be left behind in the die.
Trust me it makes a huge difference.
I place my dies skew inside my Cuttlebug – this way the pressure
seems to be all over the die. This works especially when you have
intricate dies with lots of details.
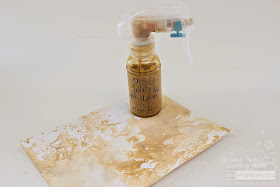
By colouring smooth white cardstock in different colours, I can
create my own custom patterned papers in the exact colours I need for my
project – making my die cuts unique and personalized each time I use
them.
Die cutting elements out of plain cardstock is so easy. They offer
the opportunity to be inked on the edges, stamped on, embossed in your
Cuttlebug, heat embossed, foiled, sanded, glittered or left plain. Each
time you add a product to a die cut, you change the look of it, giving
you loads of opportunities using them over and over again.
Tips and tricks for using die cuts:
When you cut detailed and intricate die designs on your Cuttlebug, I
recommend that you use a metal cutting plate to ensure a nice clean cut
My sandwich in my machine for cutting is as follows: A, metal place,
B, die facing up, paper, Quick release paper, C. I cut into my C plate –
why? Well this was the original ever sandwich stack and it also
prevents my B plate and C plate from curling up so much. I hardly ever
replace my C or B plates because of curling and this is the reason why.
When you use the stack A, C, B then your plates will curl excessively
and will snap and need replacing more often.
**Please note that this is my own personal experience from practice
**Please note that this is my own personal experience from practice
So go on – start using dies as accents, be brave try a cluster technique and start cutting away!
Products Used
- ULT 157136 Ultimate Crafts Celossia Cutting Dies – Spring Leaves (19 x 48mm)
- ADCO 723818 Quick Release Die Paper
- AC NEUTRALS 71793 AC Cardstock 12×12 Smooth – White
- AC ORANGES 71821 AC Cardstock 12×12 Smooth – Dandelion
- PM 573805 Color Bloom Spray – Gold Foil (59ml)
- TML-800 Memento LUXE Ink Pad – Rich Cocoa
- TML-802 Memento LUXE Ink Pad – Peanut Brittle
- PC 2000293 Cuttlebug V2
- Other: Crate Paper Paper Pad, Crate Paper Rub-Ons, Crate Paper Tickets, Truck Stamp, Diamanté and Sequins


No comments:
Post a Comment
Thank you for stopping by and leaving a comment!